Step-by-Step Guide to Image Labeling Tools in 2025
Choose a labeling tool like Labellerr or Roboflow. Upload your images and select the type of label (e.g., boxes). Use AI suggestions to speed up labeling but check for accuracy. Review the labels, then export the data in the required format for your project.

Artificial Intelligence (AI) is transforming industries worldwide, from healthcare and retail to autonomous vehicles and beyond. However, did you know that 80% of an AI project’s time is spent preparing and annotating data?
Without high-quality labeled data, AI models cannot learn effectively, leading to poor performance. This is a significant challenge for data scientists, machine learning engineers, and AI project managers who need accurate datasets to build reliable models.
Preparing training data manually is time-consuming, expensive, and prone to errors. For instance, labeling thousands or millions of images for AI models requires a significant investment in resources and workforce.
Studies show that manual annotation can account for up to 25% of an AI project’s total cost. Furthermore, inconsistencies in labeling can compromise model accuracy, leading to delays and additional costs for AI development.
Image labeling tools address these challenges by automating and simplifying the annotation process. They can reduce manual effort by up to 70%, thanks to features like AI-assisted annotations and pre-trained models.
By providing accurate and consistent labels, these tools ensure high-quality datasets, which directly improve the performance of AI models.
For example, in the healthcare industry, labeled medical images help AI detect diseases with high accuracy. In autonomous vehicles, annotated road scenes are critical for training navigation systems. In retail, labeled images help personalized shopping experiences.
But What Are Image Labeling Tools?
Image labeling tools are software platforms designed to make the data annotation process faster, more accurate, and scalable. They allow users to tag objects, create bounding boxes, or apply segmentation to images, enabling AI models to understand and learn from the labeled data.
These tools often include advanced features like AI-assisted annotations, automated workflows, and quality control mechanisms.
In AI and machine learning, image labeling tools are essential because they transform raw, unstructured image data into structured datasets. These datasets become the foundation for training AI models, especially in fields like computer vision, where image-based data is key.
Why are they important?
Image labeling tools are the backbone of AI development. Here’s why they matter:
- Accuracy: They ensure consistent and high-quality annotations, which are vital for training reliable AI models.
- Efficiency: With automation, they save time and reduce costs, enabling faster development cycles.
- Scalability: These tools handle large datasets, making them ideal for projects that require thousands or millions of labeled images.
By using image labeling tools, industries like healthcare, retail, and autonomous vehicles can scale their AI efforts and bring innovative solutions to market faster. For professionals working in AI, these tools are indispensable for overcoming the challenges of data annotation.
Table of Contents
- How Image Labeling Tools Work?
- Types of Image Annotation
- Key Components of Image Labeling Tools
- Automation vs. Manual Labeling
- Benefits of Using Image Labeling Tools
- Best Image Labeling Tools
- Choosing the Right Image Labeling Tool
- Step-by-Step Guide to Using Image Labeling Tools
- Common Challenges and Solutions in Image Labeling
- Case Studies: Real-World Applications of Image Labeling Tools
- Future Trends in Image Labeling Tools
- Conclusion
- FAQs
How Image Labeling Tools Work?
Image labeling tools help annotate raw image data to make it understandable for machine learning and AI models. These tools allow users to tag objects, create boundaries, or assign labels, turning unstructured images into structured data. Here’s a closer look at how they work and the various types of annotations they enable.
Understanding the Basics
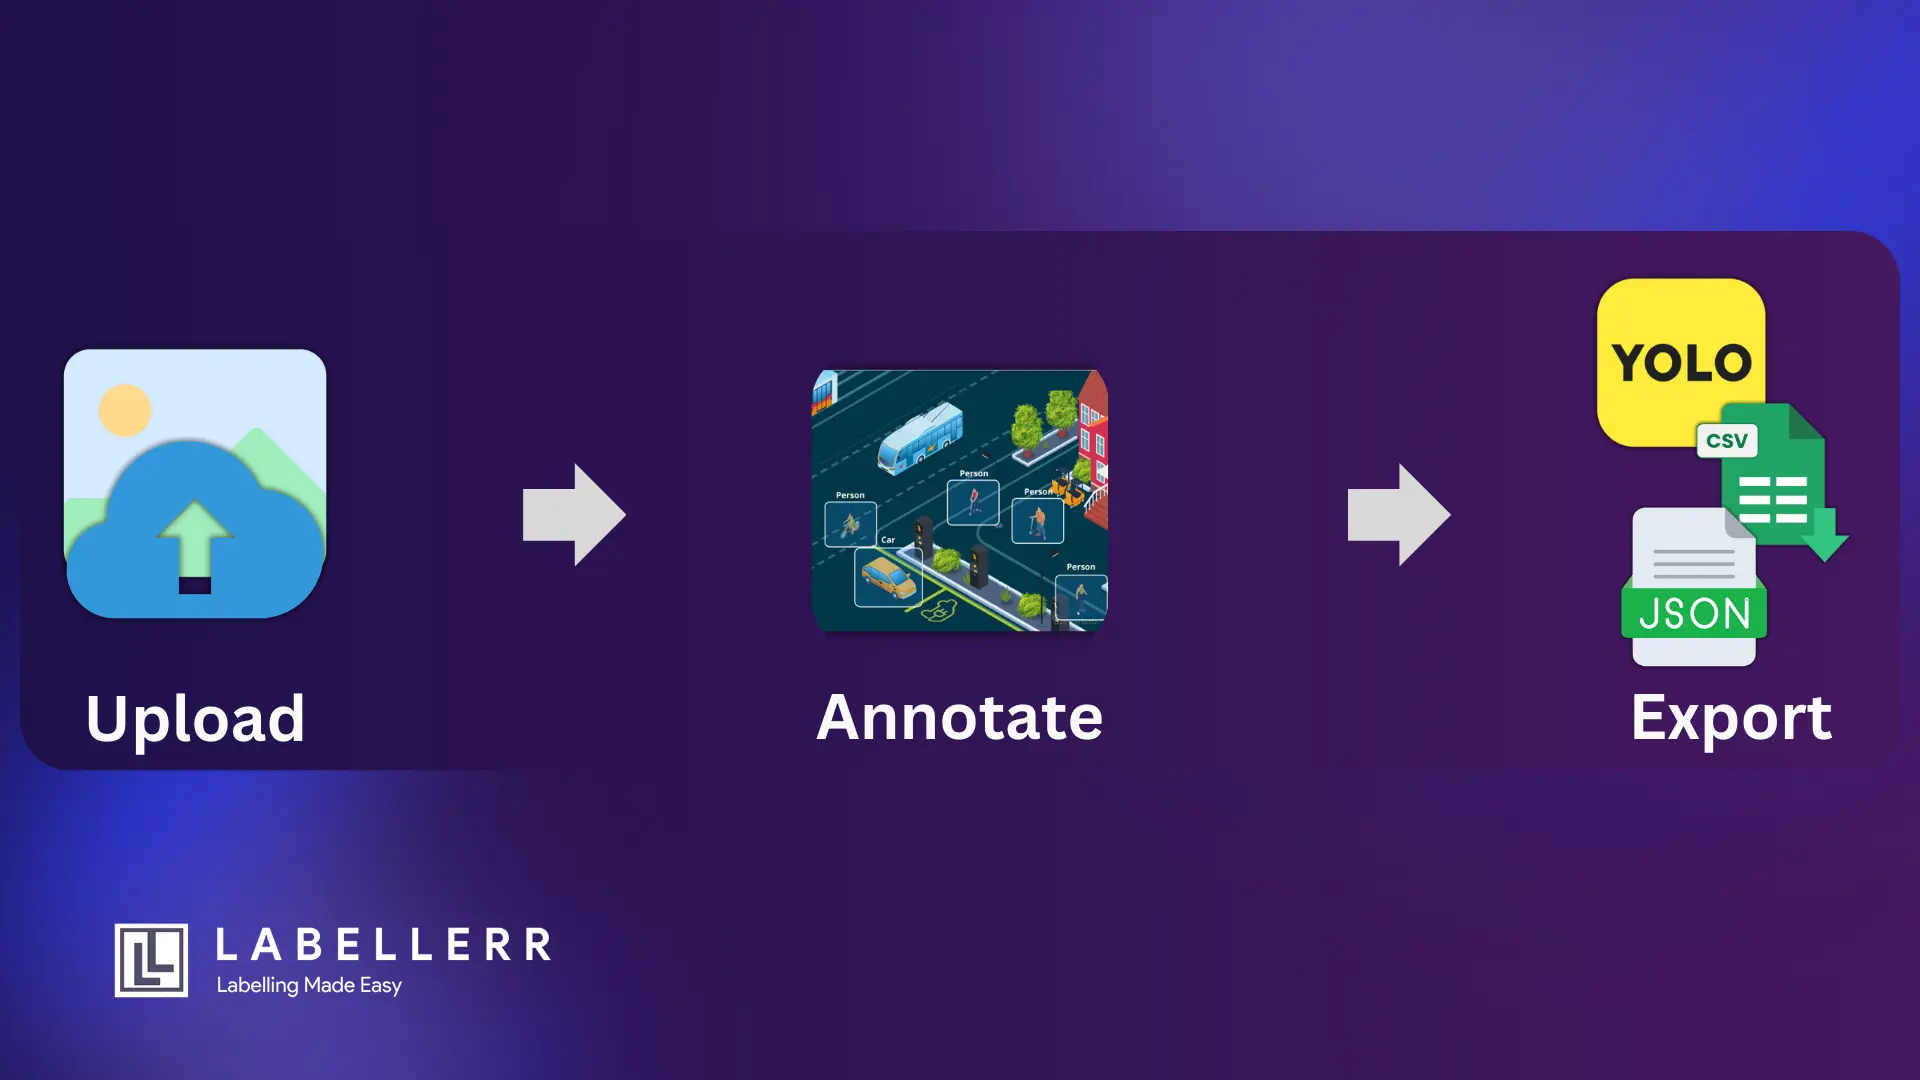
Image labeling involves identifying and marking specific elements in an image. These annotations teach AI models to recognize patterns, objects, and scenes. The process typically includes:
- Uploading Images: The user uploads raw images into the tool.
- Applying Annotations: Using features like bounding boxes, polygons, or segmentation, users label specific areas or objects in the image.
- Exporting Labeled Data: Once annotations are complete, the tool exports the labeled dataset in formats like YOLO, JSON, or COCO, ready for training AI models.
Types of Image Annotation
Here are the six main types of image annotation that labeling tools enable:
1. Bounding Boxes
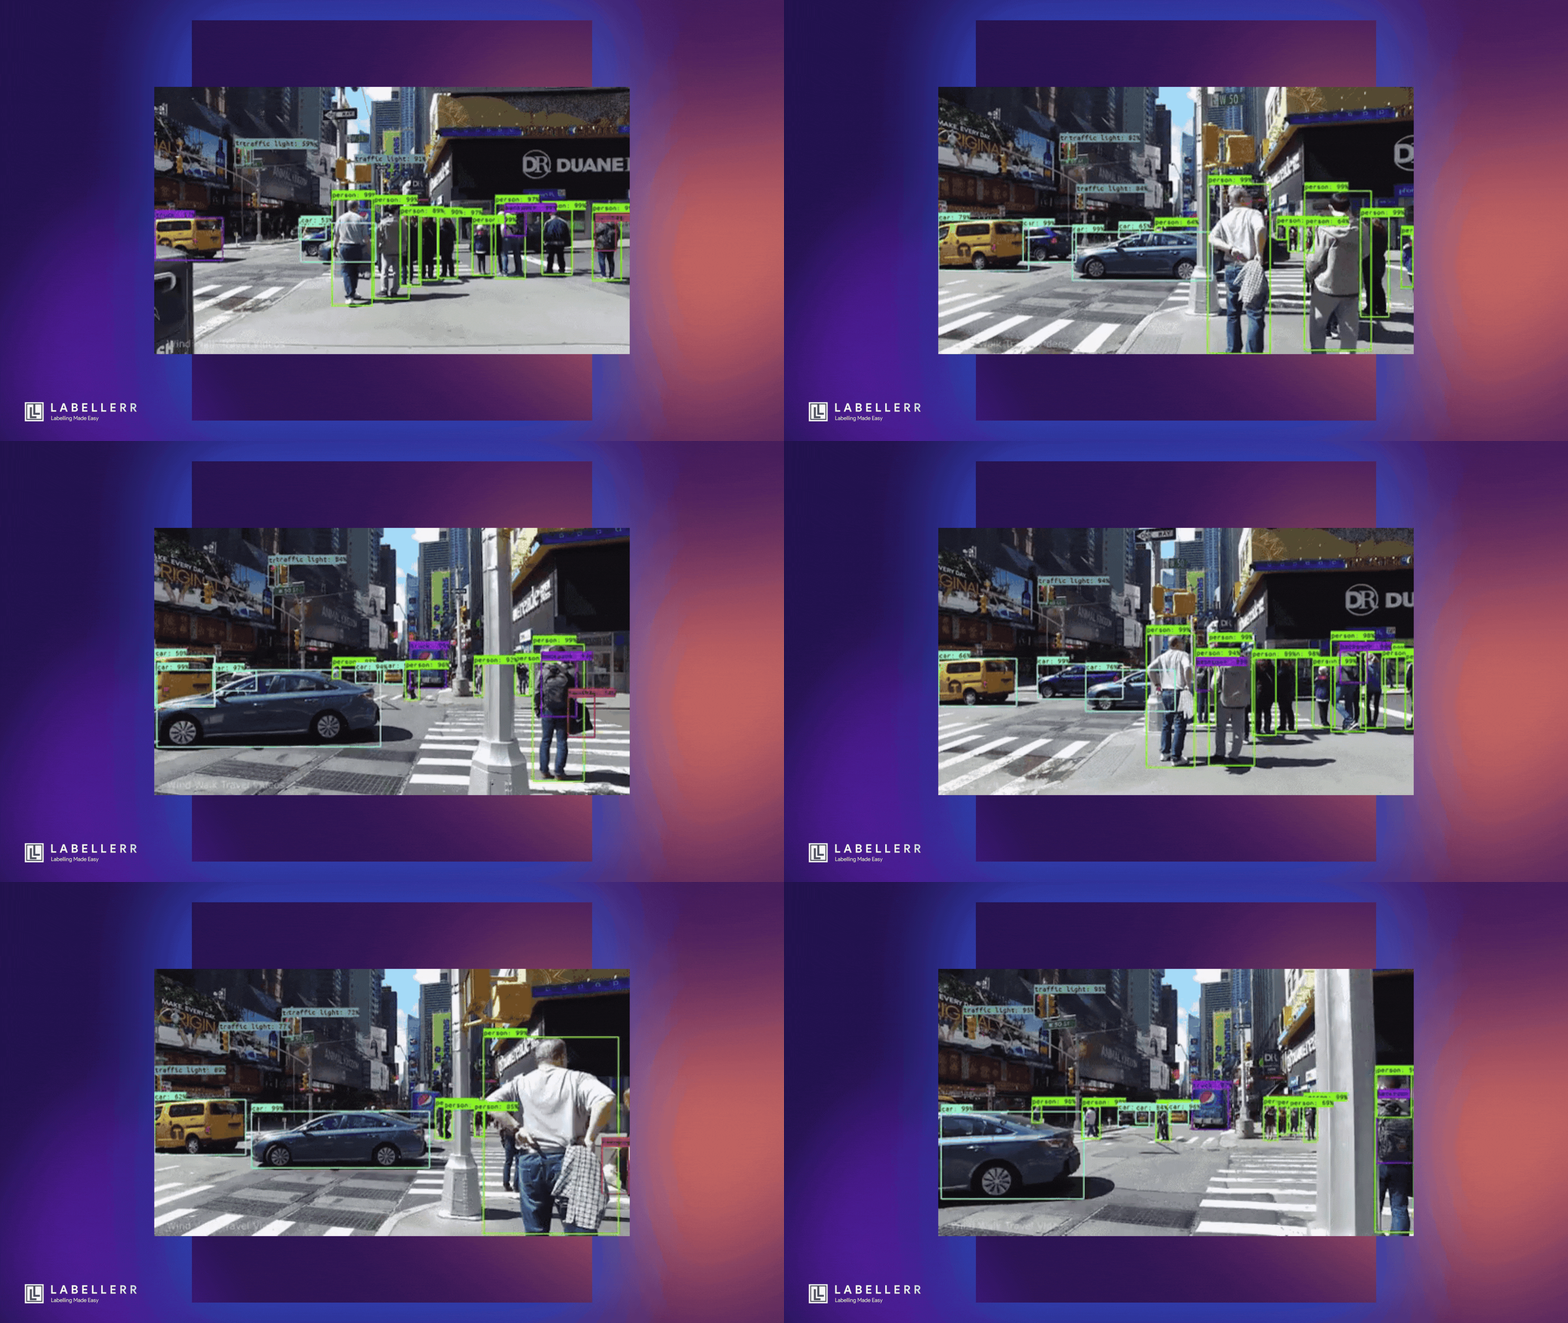
What it is:
Bounding boxes are rectangular shapes drawn around objects in an image to identify and classify them. This technique provides the coordinates of the object’s edges, making it easy for AI models to recognize and locate objects.
When to use it:
Bounding boxes are ideal when you need to identify and localize objects without requiring pixel-perfect precision. It is commonly used for object detection tasks.
Examples:
- Detecting vehicles and pedestrians in autonomous driving applications.
- Identifying products in retail inventory management systems.
- Detecting animals in wildlife monitoring systems.
2. 3D Cuboids
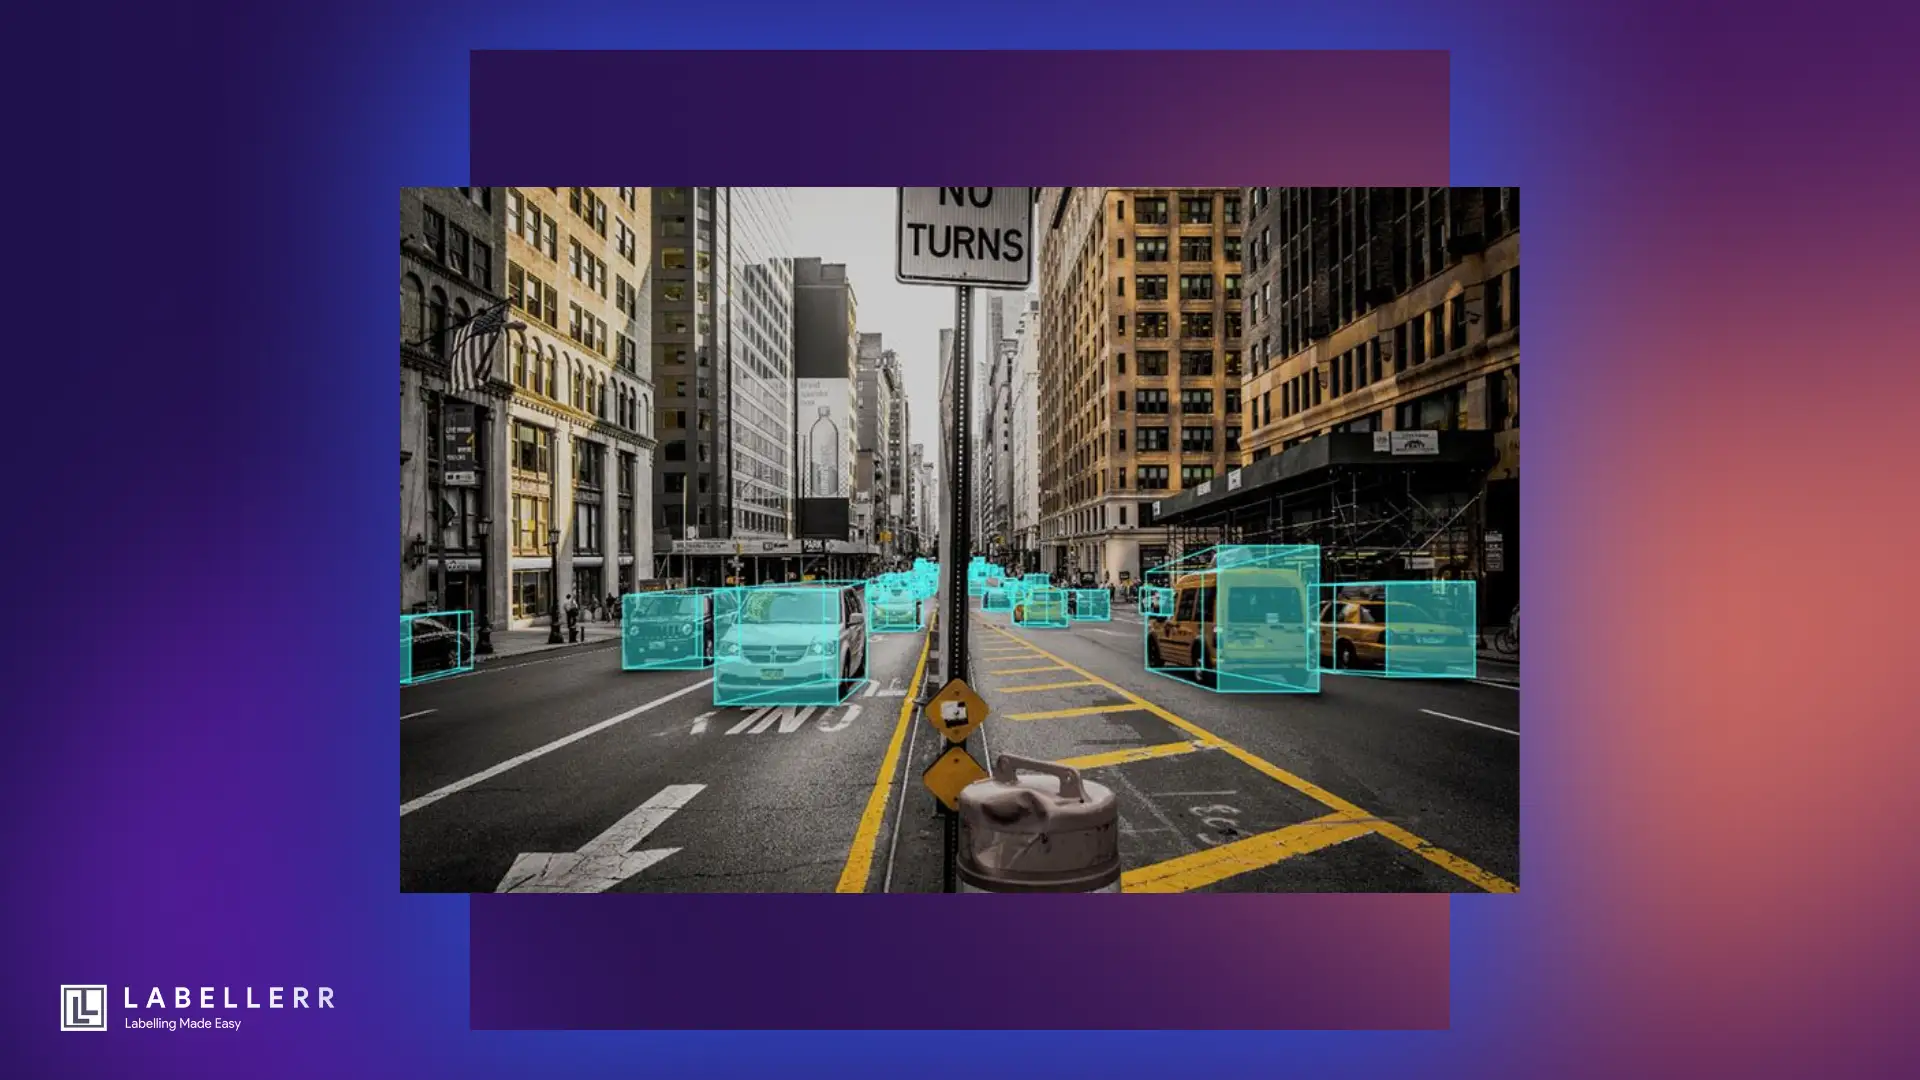
What it is:
3D cuboids are extensions of bounding boxes that add depth, height, and width to annotate objects in three dimensions. They help AI models understand the spatial orientation and volume of objects.
When to use it:
3D cuboids are used when depth perception is critical, such as in 3D object detection or tasks requiring spatial awareness.
Examples:
- Detecting and tracking vehicles in self-driving cars.
- Annotating furniture dimensions in augmented reality applications.
- Modeling warehouse spaces for robotic navigation.
3. Polygons

What it is:
Polygons are flexible shapes drawn around objects to outline their exact boundaries. Unlike bounding boxes, polygons provide detailed annotations by capturing an object’s unique shape.
When to use it:
Polygons are used when objects have irregular shapes or when precise boundary identification is required.
Examples:
- Annotating rooftops in satellite images for urban planning.
- Labeling plant leaves in agricultural datasets for disease detection.
- Detecting defects on irregularly shaped industrial parts.
4. Semantic Segmentation

What it is:
Semantic segmentation assigns a class label to every pixel in an image, grouping pixels that belong to the same object or background. This creates a detailed understanding of the entire image.
When to use it:
Semantic segmentation is used when a pixel-level understanding of the image is necessary, especially for applications requiring fine-grained analysis.
Examples:
- Segmenting road elements (lanes, vehicles, pedestrians) for autonomous driving.
- Detecting tumors in medical imaging datasets.
- Identifying areas of interest in satellite imagery, such as forests or water bodies.
5. Lines and Splines
What it is:
Lines and splines are used to annotate linear structures in images. Splines are smooth, curved lines, while straight lines are used to map simpler paths or edges.
When to Use It:
Use lines and splines to annotate pathways, boundaries, or connections where only the line structure matters.
Examples:
- Annotating road lanes for self-driving car navigation.
- Mapping power lines in aerial imagery.
- Defining structural edges in architectural plans.
Image tracking plays a crucial role in many AI applications, especially in video analysis, surveillance, and autonomous vehicles. It involves continuously identifying and following objects across frames, enabling AI models to understand object movement and behavior over time.
Image labeling tools like Labellerr simplify image tracking by providing advanced annotation features such as bounding boxes and polygons that can be linked across frames.
By integrating Labellerr’s scalable and automated image tracking annotation capabilities, organizations can efficiently build robust datasets that empower AI systems to track objects reliably in dynamic environments. Whether you are working on surveillance systems, autonomous navigation, or video content analysis, Labellerr is designed to support your image tracking needs with precision and speed.
Key Components of Image Labeling Tools
Image labeling tools are essential for preparing high-quality datasets for AI and machine learning models.
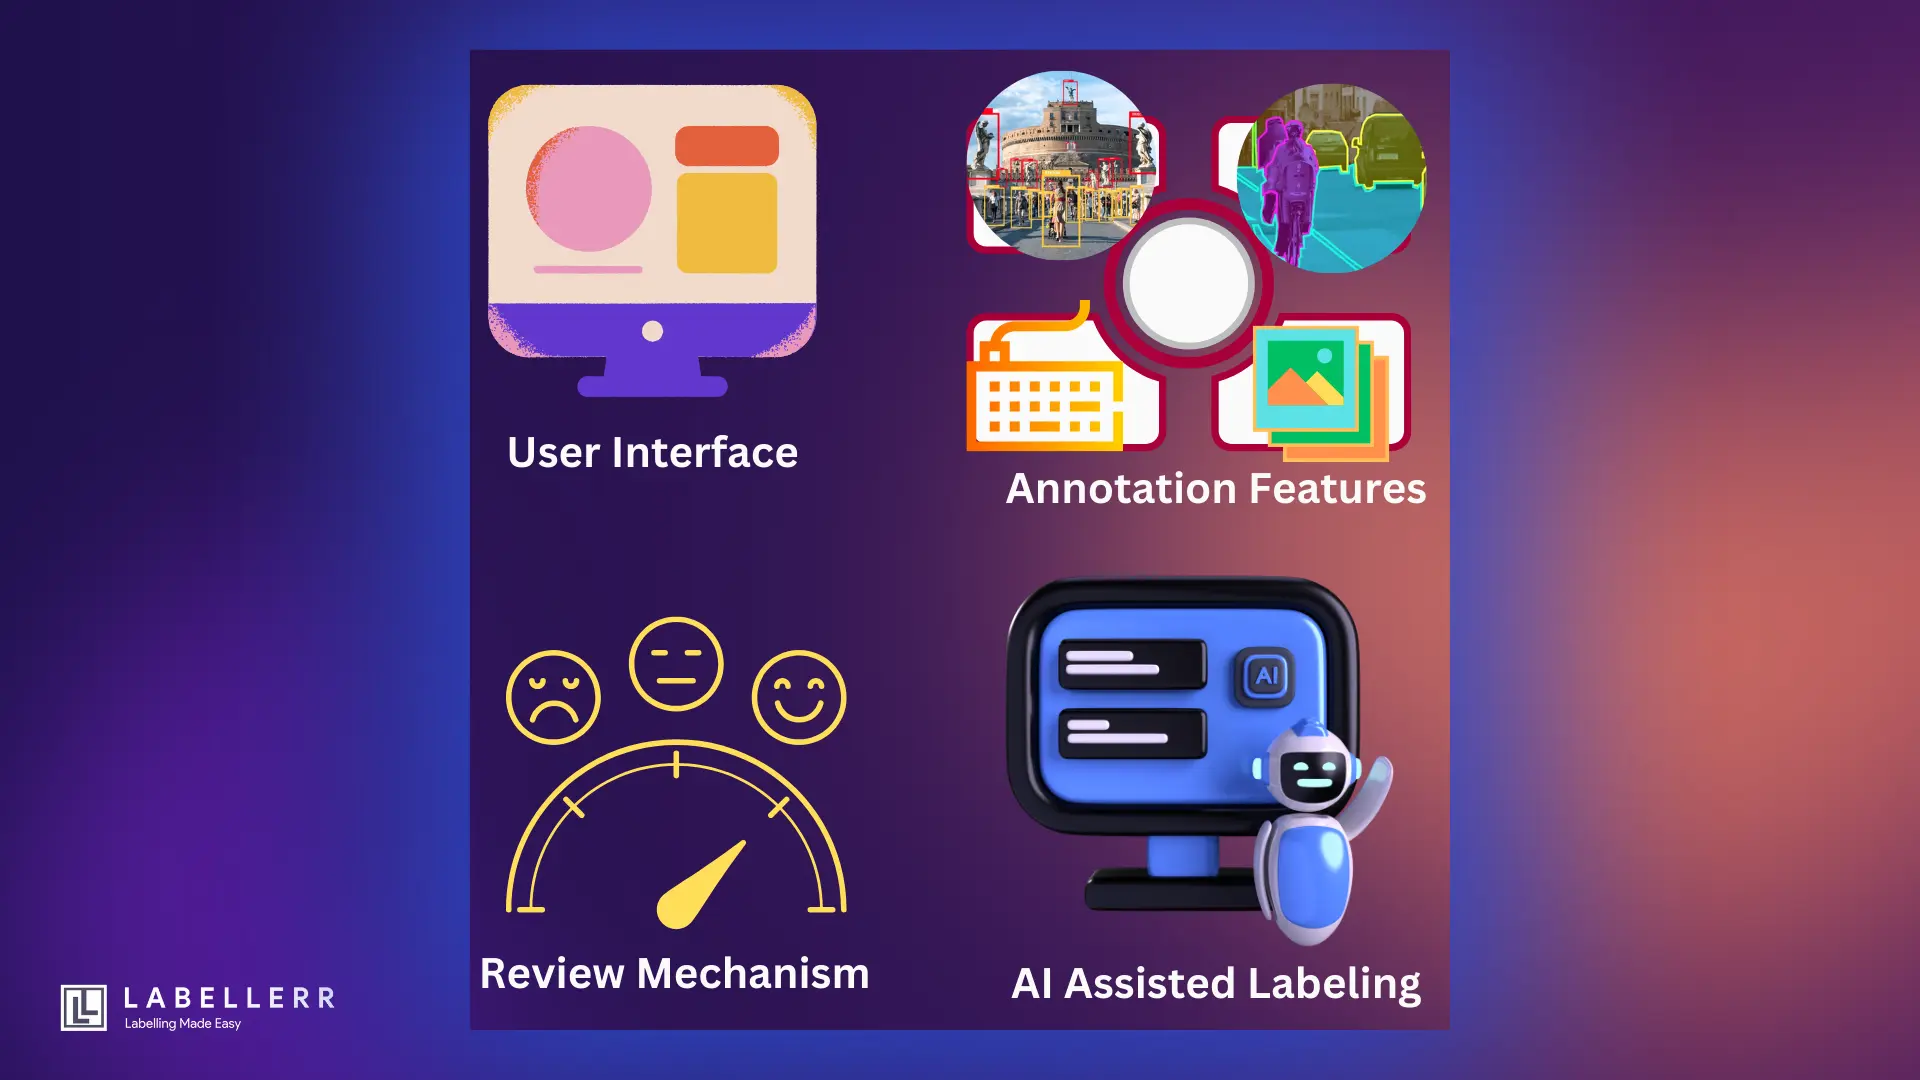
They come with several features and components that simplify the annotation process, improve accuracy, and save time. Here’s a breakdown of the key components that make these tools effective:
1. User Interface (UI)
The user interface is the first thing annotators interact with, and it plays a crucial role in making the tool easy to use.
- Intuitive Design:
A simple and clean interface allows users to quickly navigate the tool and start labeling images without extensive training. - Customization:
Many tools let users adjust the interface to suit their specific needs, such as changing layouts or adding shortcuts for frequently used features. - Visualization Options:
Tools often provide features like zoom, pan, and layer toggling to help users label intricate details in images.
2. Annotation Features
Annotation features form the core functionality of image labeling tools. These allow users to create various types of labels depending on their project needs.
- Annotation Types:
Tools support multiple annotation methods, such as bounding boxes, polygons, segmentation, keypoints, and lines. - Batch Labeling:
Annotators can label multiple images in one go, reducing repetitive tasks. - Hotkeys and Shortcuts:
Built-in shortcuts speed up the labeling process by reducing mouse clicks and movements.
3. AI-Assisted Labeling
AI-assisted labeling is a game-changing feature that speeds up the annotation process and improves accuracy.
- Auto-Labeling:
AI suggests labels for objects in the image, allowing annotators to review and make corrections if needed. - Pre-Trained Models:
Some tools come with pre-trained AI models for common tasks, such as detecting people or vehicles. - Pattern Recognition:
AI can identify and label similar objects across multiple images, saving time on repetitive annotations.
4. Review Mechanisms
Quality control is essential for creating reliable datasets, and review mechanisms ensure annotations meet the required standards.
- Collaboration Features:
Many tools allow multiple users to review and edit annotations, improving teamwork and consistency. - Consensus-Based Tagging:
Tools compare annotations from different users to ensure accuracy, especially for critical datasets. - Error Detection:
Built-in algorithms highlight potential errors, such as missing labels or incorrect boundaries. - Annotation History:
Reviewers can track changes and revert to previous annotations if needed.
Automation vs. Manual Labeling
Image labeling is a critical step in training AI models, and choosing the right approach can greatly impact the efficiency and accuracy of your project.

You can label images manually, use a semi-automated process, or rely on full automation. Here’s a detailed comparison of these approaches:
1. Fully Manual Labeling
In fully manual labeling, humans perform all annotation tasks without any automation.
How It Works:
Annotators use tools to manually draw bounding boxes, segment objects, or assign labels to images. Every detail is labeled by hand, ensuring control over the process.
Pros:
- High precision for complex and ambiguous tasks.
- Humans can make judgment calls for unclear or rare scenarios.
- Suitable for small datasets or tasks requiring expert knowledge (e.g., medical image annotation).
Cons:
- Time-consuming and labor-intensive, especially for large datasets.
- Prone to human errors and inconsistencies.
- Expensive due to the need for skilled annotators.
Example:
Manually labeling 10,000 medical images for tumor detection can take weeks and require significant resources.
2. Semi-Automated Labeling
Semi-automated labeling combines manual efforts with AI assistance. The AI suggests labels, and humans review or correct them.
How It Works:
AI models pre-label images by drawing bounding boxes or segmenting objects. Annotators then verify, adjust, or add missing labels to ensure accuracy.
Pros:
- Faster than manual labeling, especially for repetitive tasks.
- Reduces annotator fatigue by automating simple tasks.
- Allows humans to focus on improving AI suggestions for complex data.
Cons:
- Still requires human involvement, which can limit scalability.
- Initial setup may require training AI models to assist with annotation.
- Errors in AI-generated labels can increase workload if not carefully monitored.
Example:
In a semi-automated workflow, AI pre-labels vehicles in traffic images, and annotators correct errors or add missing labels. This approach can save up to 50-70% of time compared to manual labeling.
3. Fully Automated Labeling
In fully automated labeling, AI models handle the entire annotation process without human intervention.
How It Works:
Advanced AI models, often trained on similar datasets, automatically annotate images. This includes drawing bounding boxes, segmenting objects, and assigning labels.
Pros:
- Extremely fast and scalable, ideal for large datasets.
- Cost-effective for projects with straightforward and repetitive labeling tasks.
- Reduces dependency on large annotation teams.
Cons:
- Limited accuracy for complex or ambiguous tasks.
- Errors can go unnoticed without human review.
- Requires a well-trained AI model, which may involve upfront investment in data and training.
Example:
Fully automated tools can annotate thousands of product images for an e-commerce platform in hours, but they might struggle with edge cases like obscure or overlapping objects.
Which Workflow to Choose?
- Fully Manual: Best for small datasets or highly specialized tasks where precision is critical.
- Semi-Automated: Ideal for medium-sized datasets and projects requiring both speed and accuracy, like annotating autonomous vehicle data.
- Fully Automated: Perfect for large-scale projects with repetitive tasks, such as labeling thousands of social media images.
Benefits of Using Image Labeling Tools
Image labeling tools have become essential for AI and machine learning projects. They simplify the annotation process, improve data quality, and save time and costs.

Here’s a detailed look at the key benefits of using these tools:
1. Enhanced Accuracy
Image labeling tools reduce human error and ensure more consistent annotations, which are critical for training reliable AI models.
- Minimized Errors:
Manual labeling often leads to inconsistencies or mislabels due to fatigue or human oversight. Image labeling tools, especially those with AI assistance, minimize these errors by providing precise annotations or pre-labeling suggestions. - Consistent Annotations:
These tools ensure consistency across large datasets by following standardized rules and using built-in quality checks. Consistent data improves model accuracy and performance. - Example:
A healthcare project using an image labeling tool for medical imaging can achieve higher precision in identifying anomalies like tumors compared to manual annotation.
2. Time and Cost Savings
Image labeling tools significantly speed up the annotation process, saving both time and money.
- Efficiency Through Automation:
Features like AI-assisted annotation and batch labeling help process thousands of images in a fraction of the time it would take manually. - Cost-Effectiveness:
Automating repetitive tasks reduces the need for large annotation teams, lowering labor costs. Teams can focus on more strategic aspects of the project, such as model development. - Example:
An e-commerce company labeling product images can save up to 70% of time and reduce costs by automating annotations with an AI-powered tool.
3. Scalability
Image labeling tools can easily scale to meet the needs of projects, whether they involve a few hundred images or millions.
- Small to Enterprise-Scale Projects:
These tools handle datasets of all sizes, allowing startups to label small batches and large enterprises to manage vast volumes of data. - Adaptability to Growth:
As your dataset grows, labeling tools can scale without affecting efficiency or quality. This is especially important for industries like autonomous vehicles or surveillance, where new data is generated continuously. - Example:
A self-driving car company can use a scalable labeling tool to process terabytes of video footage daily, ensuring their models are constantly updated with fresh data.
4. Quality Assurance
Built-in quality control features ensure high standards of annotation and eliminate inconsistencies.
- Review Mechanisms:
Many tools include review features where annotations are verified by a second layer, either automatically or by humans. - Error Detection:
Tools can flag anomalies or inconsistencies in the labeling process, ensuring only high-quality data is used for training. - Consensus-Based Tagging:
For collaborative teams, some tools use inter-annotator agreement metrics to resolve discrepancies and maintain uniformity. - Example:
A retail company using a labeling tool for product recognition can rely on quality assurance features to ensure all product images are correctly labeled, reducing errors in AI recommendations.
Best Image Labeling Tools
Here are five top image labeling tools, explained in simple terms with their features, advantages, and limitations:
1. Labellerr
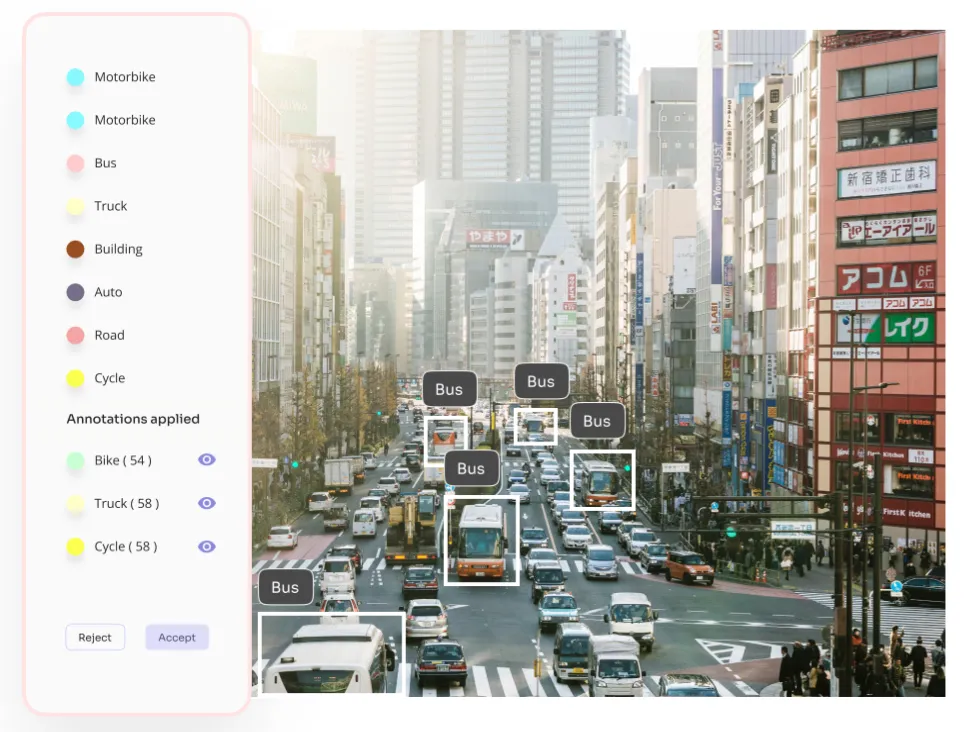
LabellerrThe initial setup may take time to integrate is an advanced platform designed to simplify the data annotation process for AI and machine learning projects. It combines automation, scalability, and ease of use to help organizations create high-quality labeled datasets.
Key Features:
- Automates the annotation process using AI to save time.
- Includes smart quality assurance for consistent and accurate labeling.
- Scales to handle large datasets and complex projects.
- Seamlessly integrates with existing machine learning pipelines.
Pros:
- Ensures high accuracy with AI-assisted annotations.
- Reduces manual effort and speeds up workflows.
- Scalable for small and large projects.
- User-friendly interface suitable for beginners and experts.
Cons:
- Does not support 3D data format.
- Does not support on-prem deployment support at the moment
G2 Review:
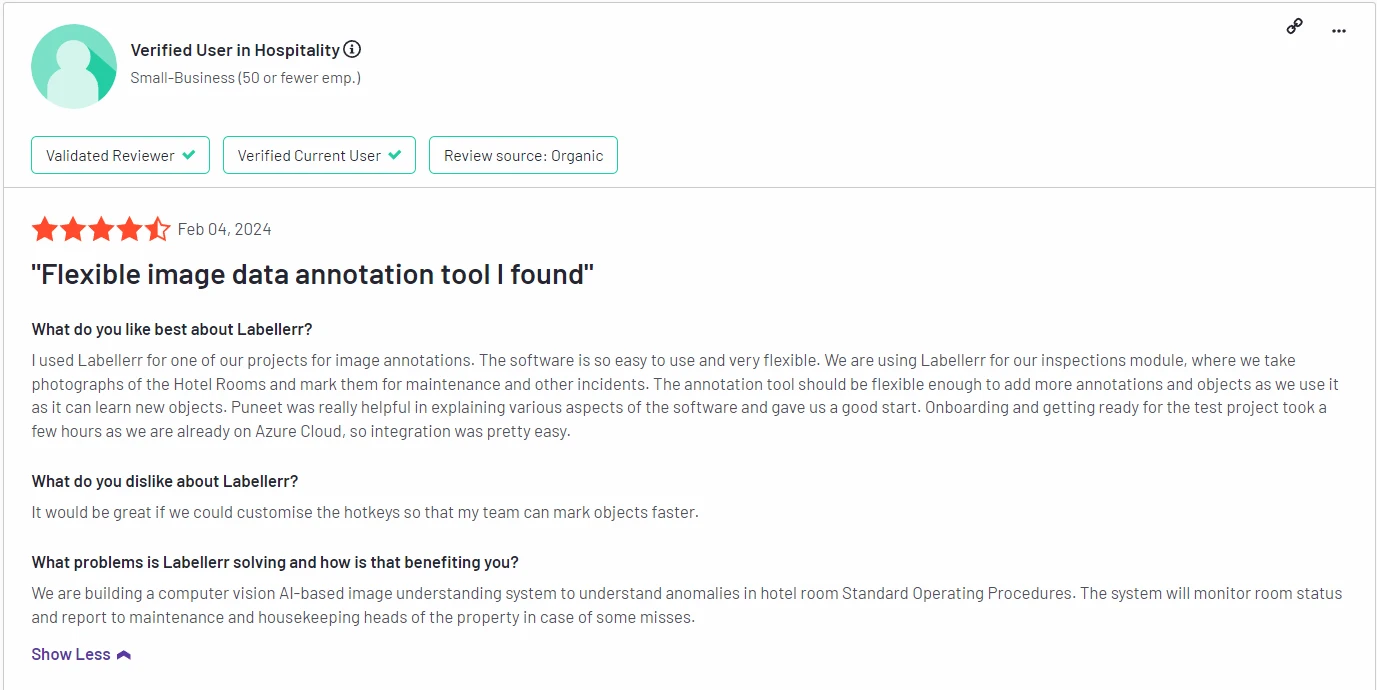
Labellerr offers a powerful data annotation tool that combines AI automation and quality assurance to help you label images faster and more accurately. Start your free trial today and see how Labellerr can streamline your AI training data preparation.
2. Roboflow

Roboflow is a popular image labeling tool designed to make the annotation process simpler and faster. It is widely used for preparing datasets for computer vision projects.
Key Features:
- Provides an intuitive interface for labeling tasks like bounding boxes and segmentation.
- Includes pre-trained models to speed up annotation.
- Supports data augmentation to expand datasets and improve model performance.
Pros:
- Easy to use, even for beginners.
- Offers features like dataset augmentation to enhance AI training.
- Supports a wide range of annotation types.
Cons:
- Not ideal for extremely large datasets without additional resources.
- Limited features for detailed quality control compared to other tools.
G2 Review:

Roboflow is praised for its simplicity and dataset preparation features. Users find it effective for computer vision projects but note limitations in scalability for very large datasets.
3. CVAT (Computer Vision Annotation Tool)
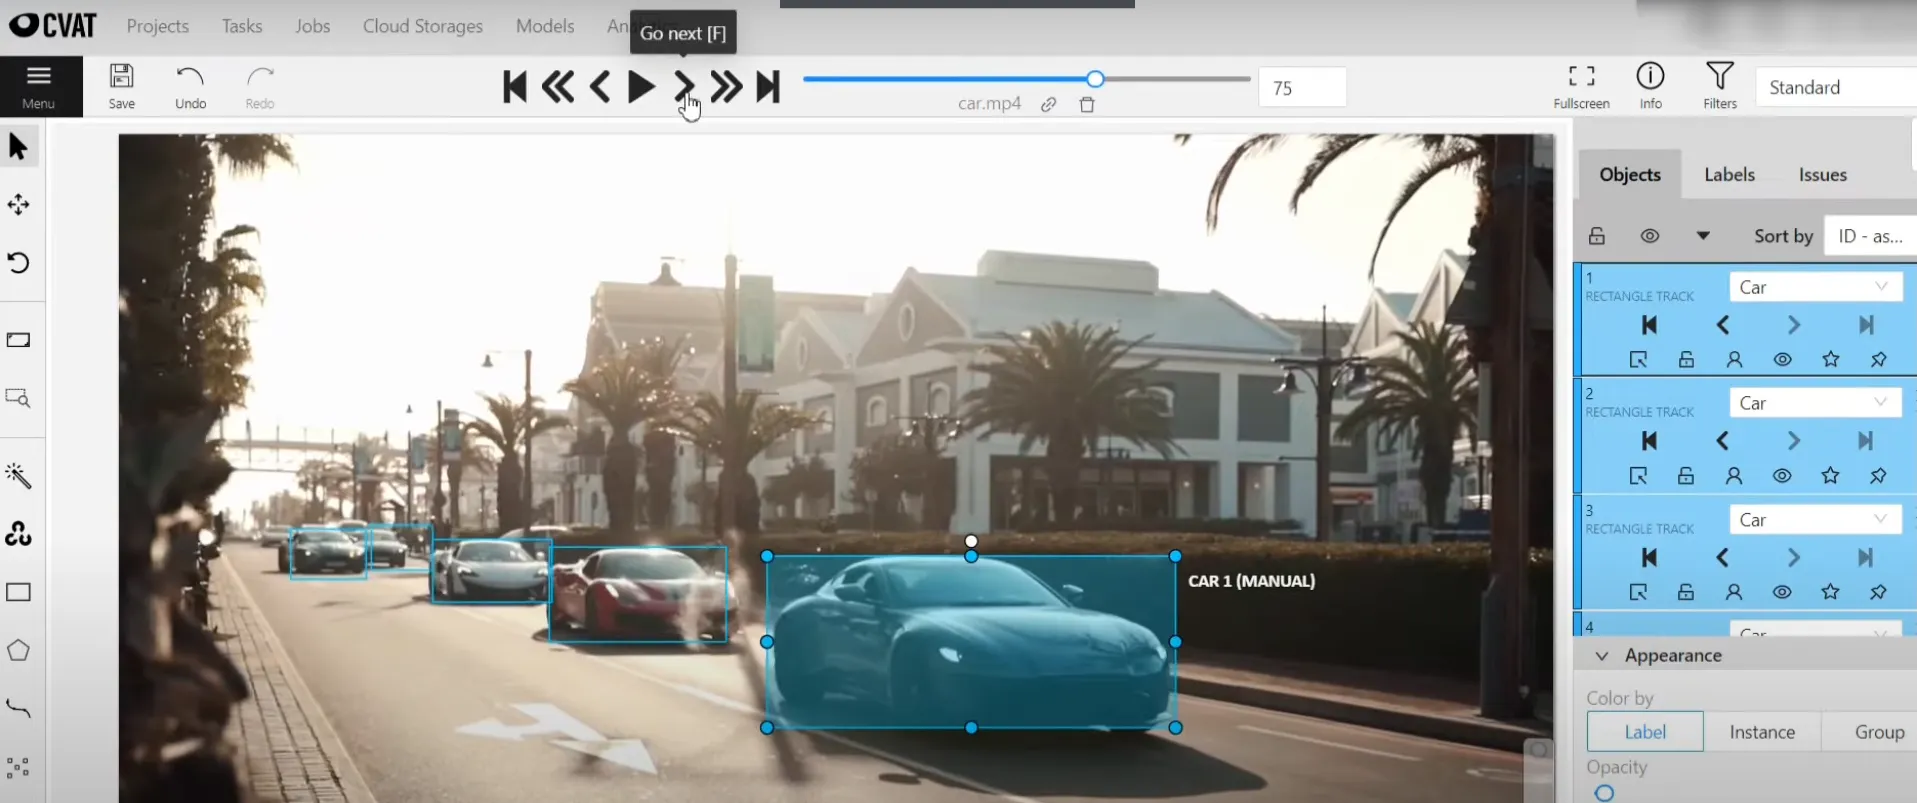
CVAT is a free, open-source tool designed for annotating images and videos. It is commonly used in research and industry for tasks like object detection and segmentation.
Key Features:
- Supports multiple annotation formats, including bounding boxes, polygons, and keypoints.
- Allows collaborative annotation with multiple users on the same project.
- Highly customizable for specific project needs.
Pros:
- Free and open-source, making it cost-effective.
- Offers a wide range of annotation tools.
- Strong community support for troubleshooting and customizations.
Cons:
- Requires technical expertise for setup and customization.
- The interface can feel less polished compared to commercial tools.
G2 Review:

Users appreciate CVAT’s flexibility and robust feature set but note that its initial setup may be challenging for non-technical users.
4. Labelbox
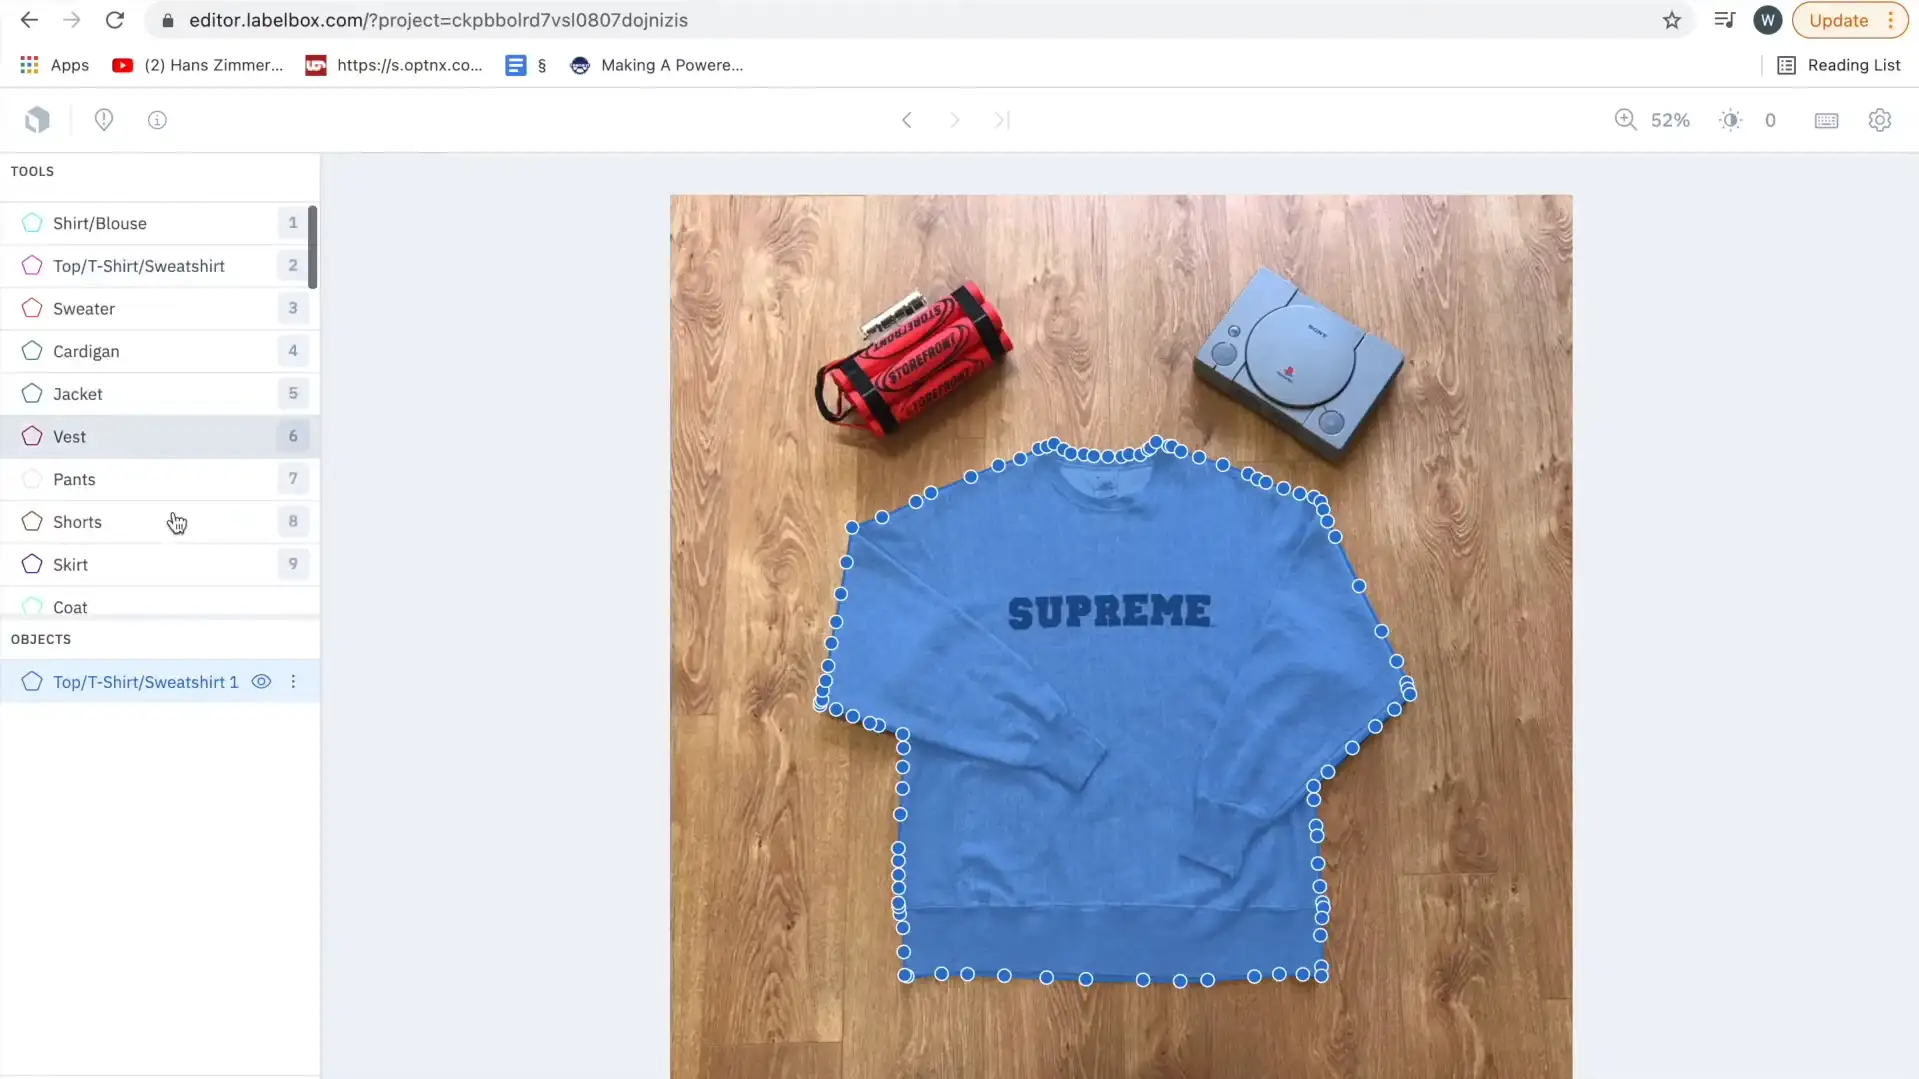
Labelbox is a comprehensive data labeling platform that helps organizations create and manage training data efficiently. It is known for its user-friendly interface and quality assurance features.
Key Features:
- Provides customizable workflows for different annotation needs.
- Includes tools to monitor and improve annotation quality.
- Allows integration with machine learning models for active learning.
Pros:
- Easy to use with a clean interface.
- Scalable for projects of all sizes.
- Strong quality control features to ensure consistent annotations.
Cons:
- Pricing can be high for small teams or startups.
- Advanced features may have a learning curve.
G2 Review:
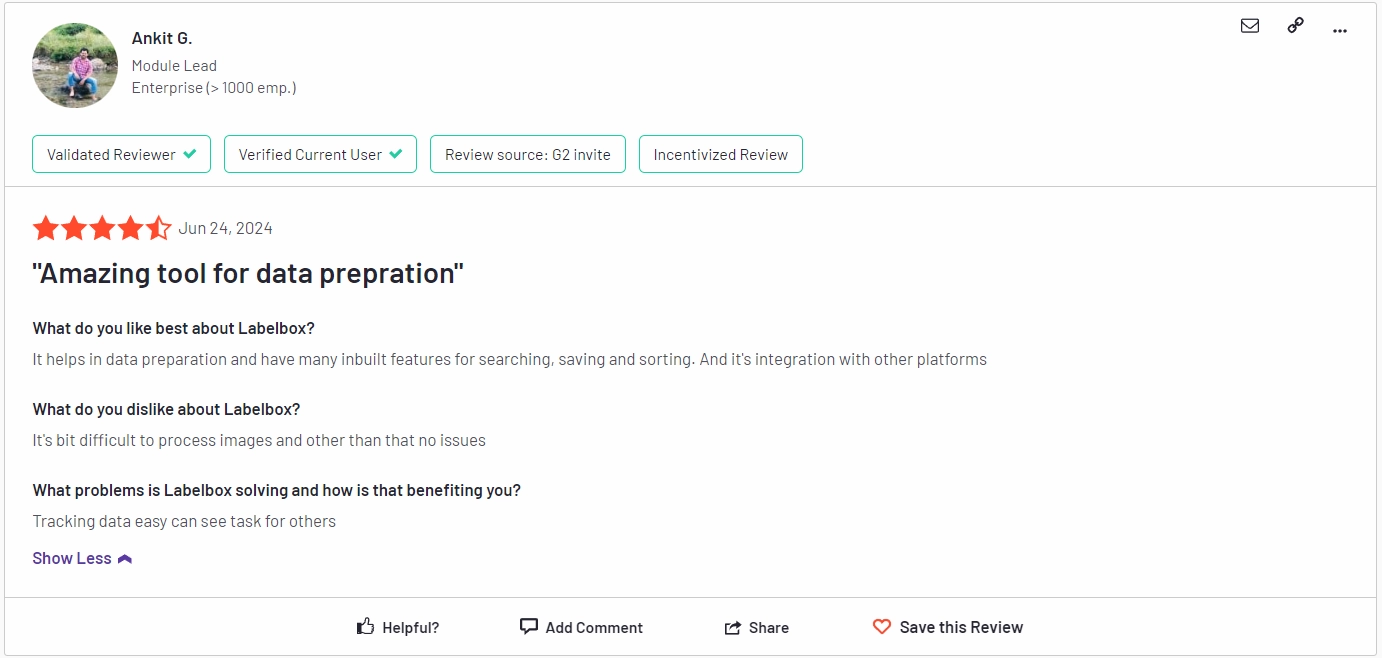
Labelbox is appreciated for its usability and quality assurance tools. However, some users mention the cost as a drawback for smaller projects.
5. SuperAnnotate
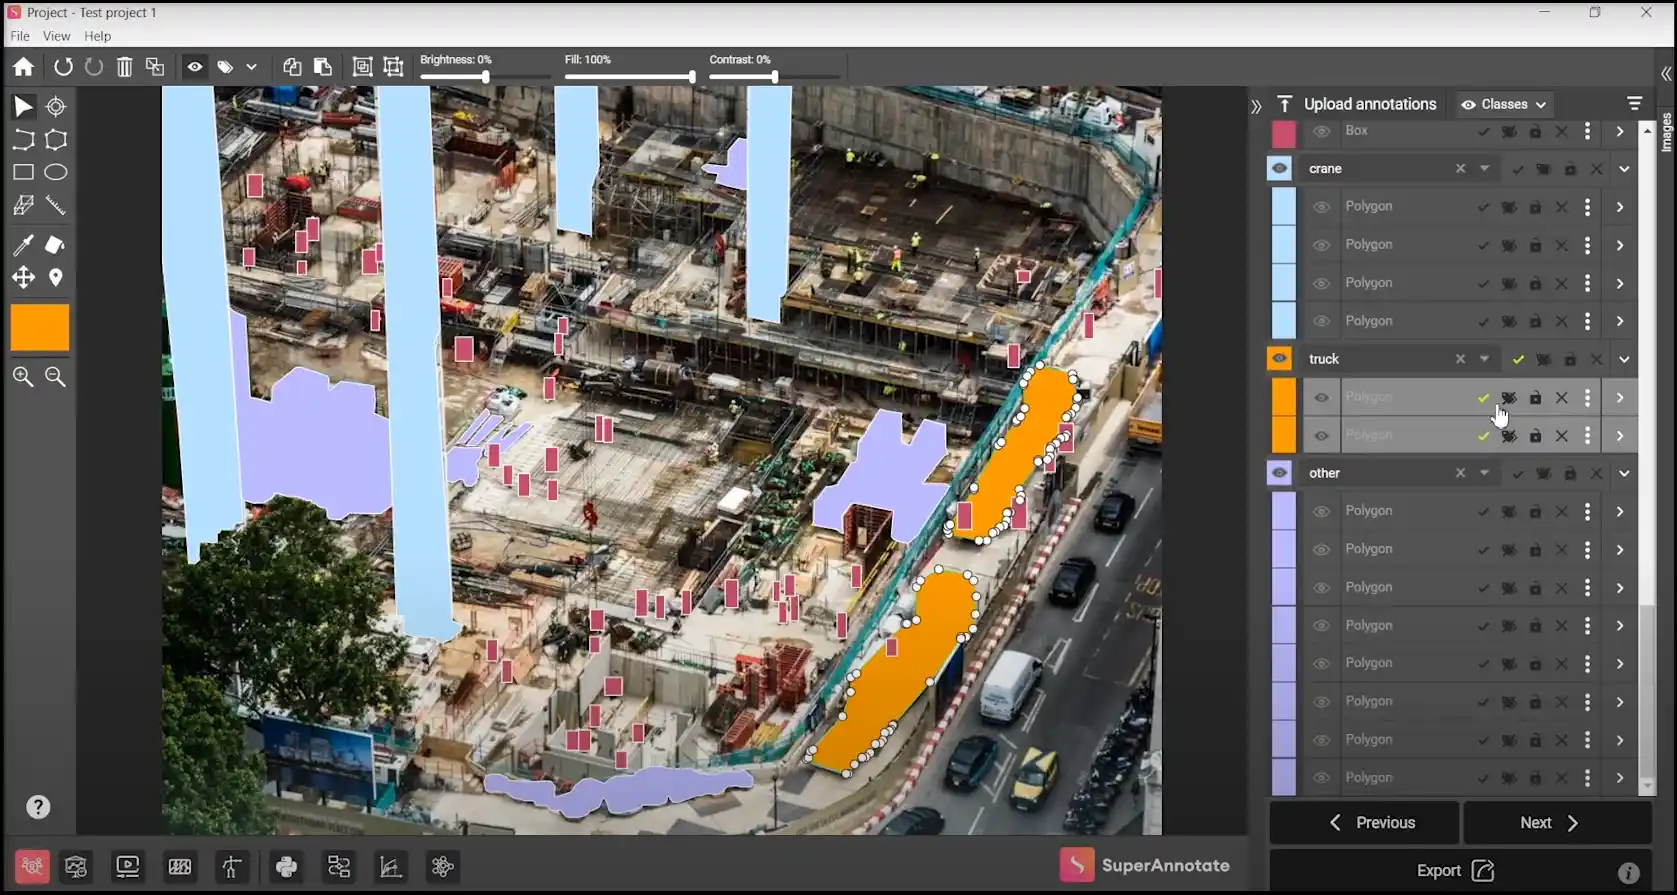
SuperAnnotate is a powerful platform for building and managing high-quality training data. It supports a wide range of data types and is known for its advanced annotation tools.
Key Features:
- Supports image, video, text, and 3D data annotation.
- Provides AI-assisted labeling to speed up tasks.
- Includes team collaboration and quality assurance features.
Pros:
- Handles a variety of data types, making it versatile.
- Enhances productivity with AI-assisted annotations.
- Suitable for large teams with collaborative workflows.
Cons:
- Advanced features may require training for new users.
- May be costly for small-scale projects.
G2 Review:
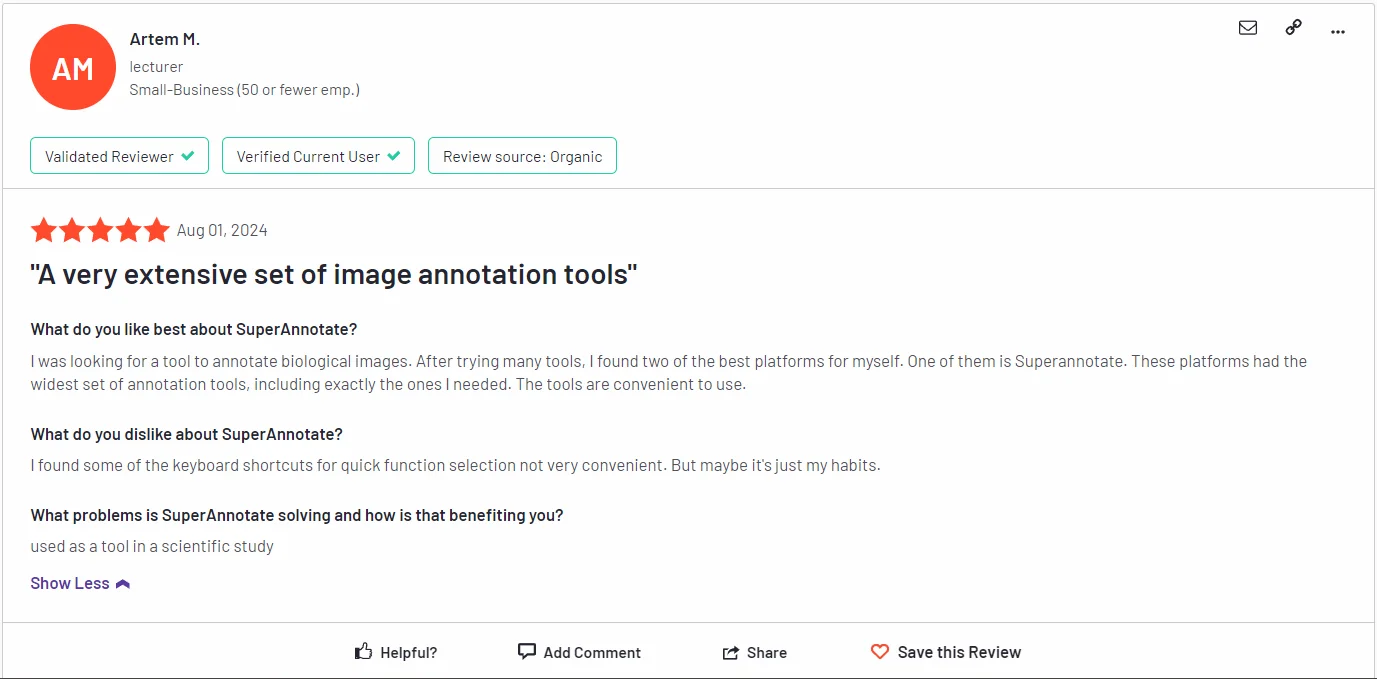
SuperAnnotate is praised for its wide range of supported data types and collaborative features, but some users mention the complexity of advanced tools as a drawback.
Choosing the Right Image Labeling Tool
Choosing the right image labeling tool is critical for ensuring accurate and efficient data annotation. The tool you select should align with your project’s needs, budget, and scale. Here’s a detailed guide to help you make the right decision.
Key Features to Consider
When evaluating image labeling tools, focus on these essential features:
- Scalability:
Ensure the tool can handle your current project size and scale as your data requirements grow. This is crucial for large datasets in industries like autonomous vehicles or surveillance. - Ease of Use:
A user-friendly interface makes it easier for your team to start labeling without extensive training. Look for tools with simple workflows and intuitive navigation. - AI-Assistance:
Choose tools with AI-powered features like auto-labeling and pre-labeling suggestions. These features can significantly reduce manual effort and improve annotation speed. - Integration Capabilities:
Ensure the tool can connect seamlessly with your existing systems, such as machine learning pipelines, cloud storage, or data management platforms. Integration simplifies workflows and saves time.
Industry-Specific Needs
Different industries have unique requirements for data annotation. Choose a tool that caters to your specific use case:
- Healthcare (Medical Imaging):
Tools designed for healthcare should support precise annotations, such as semantic segmentation for tumors or organ identification. Quality control features are essential due to the critical nature of healthcare data. - Autonomous Vehicles (Object Detection):
For self-driving cars, the tool should handle large-scale annotations like bounding boxes and polygons for road signs, pedestrians, and vehicles. Scalability and high-speed processing are key. - Retail (Product Recognition):
Retail projects need tools that can annotate product images for personalized recommendations or inventory management. The tool should support multi-label annotation for diverse datasets. - Security (Surveillance Video):
Tools for security should support video annotation for tasks like tracking objects over time or detecting unusual behavior. They must handle high volumes of data efficiently.
Cost vs. Features
Balancing affordability and functionality is essential when choosing a tool:
- Affordability:
For startups or small teams, look for cost-effective solutions with essential features. Open-source tools like CVAT can be a good starting point. - Advanced Features:
If your project requires complex annotations or scalability, consider premium tools with advanced features like AI-assisted labeling, quality assurance, and collaboration support. - Long-Term Value:
Assess the tool’s long-term value by considering how well it scales with your needs and whether it offers upgrades or additional support as your project grows.
Checklist for Selection
Follow this practical checklist to evaluate and select the best image labeling tool for your needs:
- Define Your Requirements:
- Identify your project size and the type of data you need to label (e.g., images, videos).
- List the annotation types you need, such as bounding boxes, polygons, or segmentation.
- Evaluate Key Features:
- Check for scalability, ease of use, AI-assisted labeling, and integration capabilities.
- Ensure the tool supports the file formats and workflows required for your project.
- Consider Industry Needs:
- Look for tools tailored to your industry’s specific requirements.
- Review case studies or testimonials from companies in similar fields.
- Assess Costs:
- Compare pricing models (subscription vs. pay-per-use) and ensure they fit your budget.
- Factor in any hidden costs, such as training or additional plugins.
- Test the Tool:
- Request a demo or use a free trial to test the tool’s interface and features.
- Check how quickly and accurately it processes a sample dataset.
- Check Support and Community:
- Ensure the tool provides customer support or has an active user community for troubleshooting.
- Look for documentation or tutorials to help your team get started.
Step-by-Step Guide to Using Image Labeling Tools
Using image labeling tools correctly ensures accurate and efficient annotation for your AI projects. Follow these steps to set up, annotate, review, export, and integrate your labeled data.
Step 1: Setting Up the Tool
Before starting, you need to upload your data and configure your project.
- Upload Data:
Begin by importing your images or videos into the labeling tool. Most tools support drag-and-drop uploads or integration with cloud storage platforms like AWS or Google Drive. - Organize Your Project:
Create a project within the tool and group similar datasets for better management. For example, separate datasets by category (e.g., animals, vehicles, or products). - Set Annotation Guidelines:
Define the labeling rules, such as the types of objects to annotate and the annotation format (e.g., bounding boxes or segmentation). Clear guidelines ensure consistency.
Step 2: Annotating Images
Once your project is set up, start labeling your data.
- Use Annotation Tools:
Most tools provide features like:- Bounding Boxes: Draw rectangles around objects to define their location.
- Polygons: Outline irregular shapes with precision.
- Segmentation: Label every pixel in an image to identify specific areas.
- Keypoints: Mark specific points like joints in a human body or facial landmarks.
- AI Assistance:
If the tool supports AI-assisted labeling, use it to speed up repetitive tasks. For example, the tool may suggest bounding boxes for cars or pedestrians, which you can review and adjust.
Step 3: Quality Assurance
Reviewing your annotations ensures they are accurate and consistent.
- Manual Review:
Go through a sample of annotated data to check for errors or inconsistencies. Focus on areas where objects overlap or are partially visible. - Error Detection Features:
Many tools highlight potential errors, like missing labels or incorrectly drawn boundaries. Use these features to identify and fix mistakes. - Consensus Validation:
For collaborative projects, compare annotations from multiple annotators to ensure agreement and consistency.
Step 4: Exporting Labeled Data
Once your annotations are complete, export them in the required format for AI model training.
- Choose a Format:
Common export formats include:- COCO: Used for segmentation and object detection tasks.
- YOLO: Suitable for real-time object detection models.
- Pascal VOC: Popular for bounding box annotations.
- Export Options:
Most tools allow you to customize the export settings, such as including metadata or organizing files into specific directories. - Verify Exported Data:
Check the exported files to ensure the annotations are complete and properly formatted.
Step 5: Integration with ML Pipelines
Integrating labeled data into your machine learning pipeline is the final step.
- Data Preprocessing:
Before training your model, preprocess the data to ensure compatibility with your AI framework. This may include resizing images or normalizing pixel values. - Model Training:
Load the labeled data into your machine learning framework (e.g., TensorFlow, PyTorch) and begin training. Use the exported annotations to teach your model to recognize objects or patterns. - Continuous Feedback Loop:
After training, evaluate the model’s performance. If the accuracy is low, return to your labeling tool to improve the annotations or label additional data for better results.
Common Challenges and Solutions in Image Labeling
Image labeling is essential for AI development, but it comes with challenges. Dealing with ambiguous data, managing large datasets, and ensuring consistency across teams are some common issues. Here’s how to address them effectively:
1. Dealing with Ambiguous Data
Ambiguous data includes unclear or overlapping objects, making it difficult to label accurately.
- Challenges:
- Objects that are partially visible or overlap with others.
- Poor image quality, such as low resolution or poor lighting.
- Differences in human interpretation for complex scenarios.
- Solutions:
- Clear Annotation Guidelines:
Create detailed instructions with examples to help annotators understand how to handle unclear cases. For instance, specify how to label overlapping objects. - Consensus-Based Labeling:
Use tools that allow multiple annotators to label the same data. Compare their annotations to identify the most accurate label. - AI Assistance:
Use AI-powered tools to pre-label ambiguous objects. Human reviewers can then refine these annotations. - Highlight Edge Cases:
Tag ambiguous data separately and review it with experts to ensure accuracy.
- Clear Annotation Guidelines:
2. Managing Large Datasets
Large datasets are essential for training robust AI models, but annotating them can be overwhelming.
- Challenges:
- Time-consuming manual annotation for millions of images.
- Maintaining quality while scaling up annotation efforts.
- Storage and organization of large datasets.
- Solutions:
- Batch Processing:
Divide datasets into smaller batches and label them step by step. This makes the process more manageable and allows for quality checks between batches. - AI-Assisted Labeling:
Use tools with automation features to speed up the annotation process, such as auto-labeling or pattern recognition. - Efficient Workflow Tools:
Choose labeling tools designed for scalability, with features like batch uploads, cloud storage integration, and fast annotation workflows. - Outsource Annotation:
For extremely large datasets, consider outsourcing to professional annotation teams who use specialized tools.
- Batch Processing:
3. Ensuring Consistency Across Teams
When multiple annotators work on the same project, inconsistencies can arise, affecting the quality of labeled data.
- Challenges:
- Different annotators interpret guidelines in various ways.
- Variations in labeling accuracy and style among team members.
- Difficulty tracking and resolving discrepancies in large teams.
- Solutions:
- Standardized Guidelines:
Develop detailed and standardized annotation rules that all team members follow. Include examples for each type of annotation. - Training Sessions:
Train all annotators before starting the project to ensure they understand the guidelines and tool functionality. - Review and Feedback Loops:
Implement a two-tier review system where a second team reviews the annotations for consistency. Provide feedback to annotators to improve their accuracy. - Collaboration Tools:
Use annotation platforms that support team collaboration, allow tracking of changes, and provide inter-annotator agreement metrics to measure consistency.
- Standardized Guidelines:
Case Studies: Real-World Applications of Image Labeling Tools
Image labeling tools play a critical role in creating high-quality datasets for AI projects. Here are two examples of how Labellerr has helped organizations achieve their goals in sustainability and waste management and healthcare and research.
1. Sustainability and Waste Management
Case Study: How Spare-it Improved Waste Segmentation with Labellerr
Overview:
Spare-it, a company focused on sustainability, wanted to enhance waste segregation using AI. They needed a reliable tool to label their dataset of waste images for training an accurate AI model.
Challenges:
- Handling images with different lighting conditions and overlapping objects.
- Creating a scalable solution for labeling waste materials like plastics, paper, and metals.
- Ensuring high accuracy for better waste classification.
Solution with Labellerr:
- Labellerr’s AI-assisted labeling simplified the process of annotating waste images.
- The platform provided accurate segmentation, making it easier to train their AI model.
- Labellerr’s quality control tools reduced errors and ensured consistent annotations.
Results:
- Reduced labeling time by 60%, speeding up the AI model’s development.
- Improved accuracy of waste classification, leading to better waste management.
- Scaled up the labeling process efficiently for large datasets.
Impact:
Spare-it successfully launched an AI model that helps organizations improve their waste segregation practices, supporting sustainability goals.
2. Healthcare and Research
Case Study: Automating Quality Control for Newborn Weight Estimation with Labellerr
Overview:
A research organization partnered with Labellerr to create a precise 3D model of newborns. They used this model to estimate newborn weights, which is crucial for healthcare interventions.
Challenges:
- Labeling thousands of newborn images taken in varied conditions, such as poor lighting or unusual angles.
- Ensuring consistent and accurate labels for reliable AI model training.
- Reducing the time spent on manual labeling while maintaining high-quality annotations.
Solution with Labellerr:
- Labellerr’s object classification tools provided over 25 specific tags for detailed labeling of newborn images.
- The platform automated annotation tasks, reducing manual work by 70%.
- Labellerr supported a two-tier review system, ensuring consistent quality control.
Results:
- Enhanced the accuracy of the AI model in estimating newborn weights.
- Created a precise 3D model, improving healthcare outcomes for newborns.
- Reduced project time and costs with Labellerr’s scalable annotation features.
Impact:
The research organization developed an AI-powered mobile app that frontline healthcare workers can use to assess newborn weights accurately, improving early healthcare interventions.
These case studies show how Labellerr transforms AI projects across industries. Whether improving waste management or advancing healthcare, Labellerr helps organizations create high-quality datasets efficiently and accurately. With tools like Labellerr, you can accelerate your AI project and achieve impactful results.
Future Trends in Image Labeling Tools
Image labeling tools are evolving rapidly, driven by advancements in AI and the need for greater efficiency. Here are the key trends shaping the future of image labeling:
1. AI-Assisted Annotation Advancements
AI-assisted annotation is becoming smarter and more efficient, making the labeling process faster and more accurate.
- How It Works:
Modern tools use AI to pre-label data, identifying objects and applying labels automatically. Annotators then review and refine these suggestions instead of starting from scratch. - Advancements:
AI models are now better at recognizing patterns, even in complex images. They can detect multiple objects, identify overlapping items, and suggest accurate boundaries. - Benefits:
These advancements reduce manual effort, speed up the annotation process, and improve the quality of labeled data. - Example:
A healthcare tool may pre-label tumors in MRI scans, allowing doctors to focus on verification rather than annotation.
2. Integration with Generative AI
Generative AI is opening new possibilities for automating complex labeling tasks.
- How It Works:
Generative AI models, such as GANs or transformers, can create synthetic data or predict labels for ambiguous images. This helps annotate scenarios that are difficult to label manually. - Role in Labeling:
- Automatically completing partial labels.
- Generating additional labeled data to train AI models when real-world data is limited.
- Filling in gaps for incomplete or low-quality datasets.
- Benefits:
Generative AI reduces the need for extensive manual effort and addresses challenges like missing or ambiguous data.
3. Increased Focus on Edge Cases
Edge cases, such as rare or unclear objects, pose a significant challenge in labeling. Future tools will focus on addressing these scenarios effectively.
- The Challenge:
Rare events or ambiguous objects often require expert labeling, slowing down the process and increasing costs. - Future Solutions:
- Specialized AI Models: Tools will use AI models trained specifically to handle edge cases, improving accuracy for these difficult scenarios.
- Human-in-the-Loop Systems: A combination of AI and human expertise will ensure these edge cases are labeled accurately.
- Feedback Loops: Annotators can flag edge cases, allowing AI models to learn from these scenarios and improve over time.
- Benefits:
Focusing on edge cases will enhance the overall quality of datasets and improve AI model performance in real-world applications.
Conclusion
Image labeling tools play a vital role in the success of AI development. They make the process of preparing high-quality datasets faster, more accurate, and scalable. Whether you are working on small projects or large-scale AI initiatives, these tools help save time, reduce costs, and improve the performance of your models.
Using the right tool can transform how you handle data annotation. Tools like Labellerr offer features like AI-assisted annotation, scalability, and seamless integration, making them ideal for efficient and accurate labeling. By simplifying workflows and ensuring quality, they allow your team to focus on building better AI solutions.
Don’t let slow and manual labeling hold back your AI projects. Take the first step today. Explore a reliable image labeling tool to speed up your process and achieve better results. Start your journey with tools like Labellerr and unlock the full potential of your AI projects!
Frequently Asked Questions
1. What is image labeling?
Image labeling is the process of tagging or annotating objects in images to create datasets for machine learning or computer vision projects.
2. How do AI-powered labeling tools help?
AI-powered tools suggest labels automatically, speeding up the process and improving accuracy, though human review is still important.
3. What types of annotations can be used?
Common annotation types include bounding boxes, polygons, segmentation masks, and key points, depending on your project needs.
4. Are image labeling tools easy to use?
Most modern tools are user-friendly, with simple interfaces and features that guide users through the labeling process, even for beginners.
5. How can I ensure the quality of my labeled data?
After labeling, review each annotation carefully, use quality assurance features in the tool, and run tests to check for consistency and accuracy.

Simplify Your Data Annotation Workflow With Proven Strategies
.png)


