Create Object Detection Model Using Python & Open CV
Learn to build real-time object detection with Python, OpenCV, and YOLOv5. This guide walks you through environment setup, using PyTorch's YOLOv5 for object recognition, and displaying labeled detections for safer driving applications.

Table of Contents
Introduction
Real-time object detection is an emerging technology that has the potential to revolutionize the way we drive.
The problem it addresses is the safety concern caused by unexpected objects or obstacles on the road, which can lead to accidents and injuries. Real-time object detection technology aims to provide drivers with an automated system to identify and alert them about any obstacles.
The problem of unexpected objects on the road is significant and can lead to severe consequences. According to the World Health Organization, road traffic accidents result in 1.35 million deaths globally each year, with an additional 20-50 million injuries.
These accidents also cost the global economy an estimated $518 billion annually. The problem is not only limited to human life and the economy, but it also affects the quality of life for individuals who are left injured. (Source)

Computer vision is a field of artificial intelligence that enables machines to interpret visual data from the world around them.
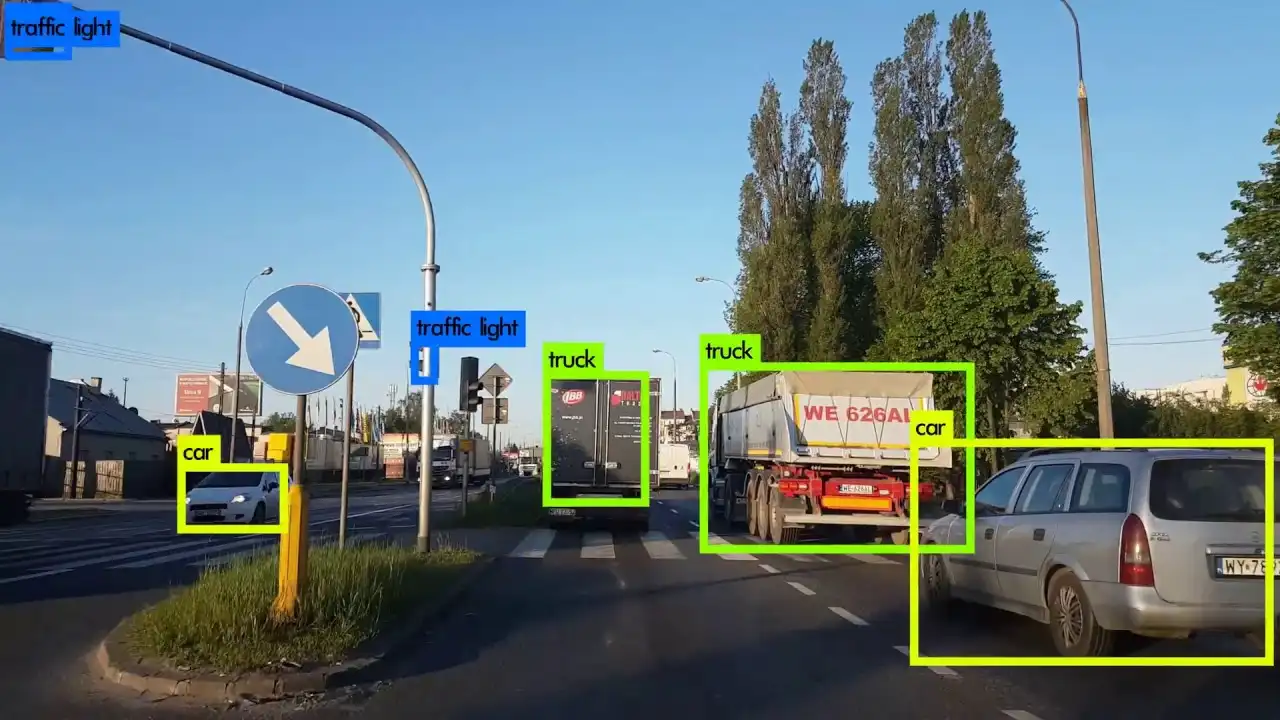
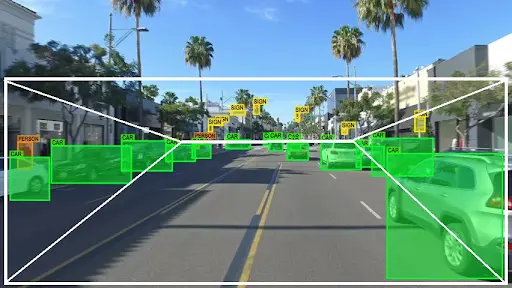
In real-time object detection, computer vision can be used to develop algorithms and systems that can recognize and classify objects in real-time, such as pedestrians, cyclists, vehicles, and animals.
These algorithms use deep learning techniques, which enable them to learn and adapt to new situations and objects over time.
One such company that does Real-time object detection for a safe driving experience is NAUTO.
NAUTO provides real-time object detection technology for safer driving. Their solution involves using advanced computer vision algorithms to detect and classify objects on the road in real-time.
Read our previous blog to know more on the use case.

NAUTO's system is designed to work with existing commercial vehicles, making it easy for fleets to integrate the technology.
The system is mounted on the vehicle's windshield and consists of a camera, a processor, and a cellular data connection. The camera captures video of the road ahead, which is then processed by the onboard processor in real time.
The processor uses deep learning algorithms to analyze the video stream and identify objects on the road, such as cars, pedestrians, and cyclists. The system can detect and track multiple objects simultaneously, even in complex driving scenarios like intersections or roundabouts.
When an object is detected, NAUTO's system provides the driver with real-time alerts, such as visual and audible warnings, to help them avoid collisions. The alerts are customized based on the specific object detected and the level of risk associated with it.
For example, if a pedestrian is detected crossing the road ahead, the driver will receive an alert with enough time to take evasive action.
Prerequisites
To proceed further and understand CNN based approach for detecting casting defects, one should be familiar with the following:
- Python: We have used python for writing the below code.
- Open-cv: OpenCV (Open Source Computer Vision Library) is a popular open-source computer vision and machine learning software library for image and video processing.
- Jupyter Notebook: Jupyter Notebook is an open-source web application that allows you to create and share documents that contain live code, equations, visualizations, and narrative text, all in a single document.
Apart from the above-listed tools, there are certain other theoretical concepts one should be familiar with to understand the below tutorial.
YOLOv5
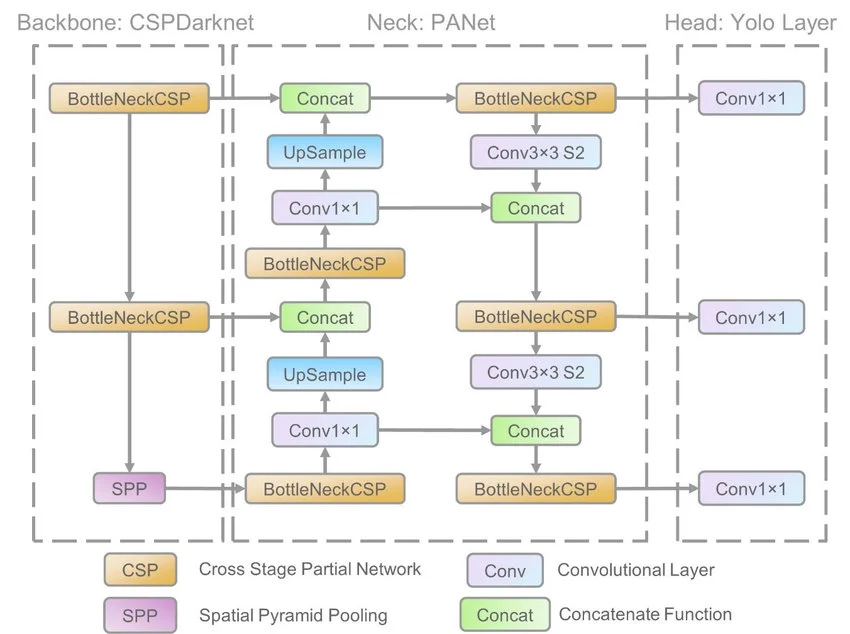
YOLOv5 is an open-source real-time object detection algorithm developed by Ultralytics. It is the latest version of the YOLO (You Only Look Once) family of object detection algorithms.

YOLOv5 is based on the anchor-free approach, which predicts the bounding boxes and class probabilities directly from the image pixels without using predefined anchor boxes. YOLOv5 is known for its high accuracy, speed, and ease of use.
It has been trained on various datasets, including COCO, Pascal VOC, and Open Images, and can detect over 80 object categories.
Methodology
- We begin by importing the required libraries.
- We then load the pre-trained YOLOv5 model from PyTorch.
- We start Image detection using Open-CV.
- The model then uses the image frame captured by open-cv, which detects objects in the image frame and predicts the corresponding class label with annotations.
- We display the output for each frame by drawing a rectangle over the predicted coordinates and classifying them with each predicted label.
Implementation
Environment Setup
Below are points that need to be done before running the code:
- The code below is written in my local jupyter notebook. Therefore, install jupyter. You can refer to this https://www.anaconda.com/products/distribution. You can install anaconda and use jupyter from there.
- The code is written in Pytoch. Thus to make sure that PyTorch is installed, run.
import torch
print(torch.__version__)
In case not pytorch is not installed, follow the instructions:
- Go to the PyTorch website (https://pytorch.org/get-started/locally/) and select the appropriate configuration for your system. You will need to choose the version of PyTorch, the operating system, and the package manager you are using (e.g., pip).
- Copy the installation command for your chosen configuration from the PyTorch website.
- Open the terminal and paste the command you copied from the PyTorch website. Press Enter to execute the command and begin the installation process.
- Wait for the installation process to complete. Once finished, you can verify that PyTorch is installed by running the import torch in a Python console. If there are no errors, PyTorch is installed and ready to use.
Hands-on with Code
We begin by importing the required libraries.
import cv2
import torch
Next, we load our pre-trained Yolov5 model, which we will be used for predicting and detecting output in real time.
# Set device for running the model
device = torch.device('cuda:0' if torch.cuda.is_available() else 'cpu')
model = model.to(device)
In the final step, we start detecting real-time objects using OpenCV.
# This code initializes the OpenCV video capture object cap and sets it to
capture video from the default camera (0).
cap = cv2.VideoCapture(0)

# Then it enters an infinite loop to continuously read frames from the video
stream using cap.read().
while True:

#    The returned values ret and frame are used to
# perform object detection on the current frame using a YOLOv5 model (not shown in the code).
    ret, frame = cap.read()
    print(frame)

    # Perform object detection on the current frame
    results = model(frame)

#    The results of object detection are then used to draw bounding boxes around
detected objects in the
# current frame using OpenCV's cv2.rectangle() function.
    for result in results.xyxy[0]:
        x1, y1, x2, y2, conf, cls = result
        cv2.rectangle(frame, (int(x1), int(y1)), (int(x2), int(y2)), (0, 255, 0), 2)

        # Additionally, the object class and confidence score are displayed
        above each bounding box using cv2.putText().
        cv2.putText(frame, f"{model.names[int(cls)]} {conf:.2f}", (int(x1),
        int(y1 - 10)), cv2.FONT_HERSHEY_SIMPLEX, 0.5, (0, 255, 0), 2)

    # Display the resulting frame
    cv2.imshow('Real-time Object Detection', frame)

    # Exit on pressing 'q' key
    if cv2.waitKey(1) == ord('q'):
        break

# Release the capture object and close all windows
cap.release()
cv2.destroyAllWindows()
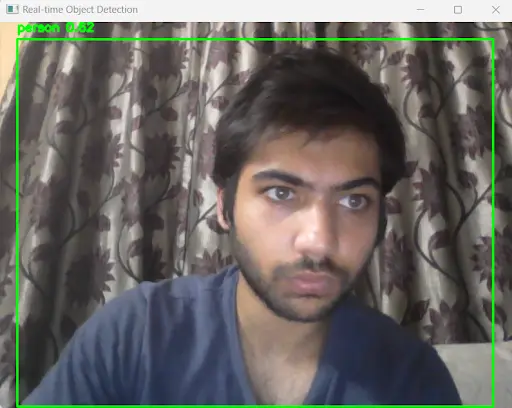
Above, we set our camera to default. We start capturing the images/frame using the camera. The frame is passed to the model, and as output, we receive coordinates and the corresponding class for the detected object.
Using these coordinates, we plot a rectangle around it with the required class name written on it.
Output

Conclusion
In conclusion, real-time object detection technology has the potential to revolutionize the way we drive and address the significant safety concerns caused by unexpected objects on the road.
Using deep learning techniques, computer vision enables machines to interpret visual data from the world around them and recognize and classify objects in real-time, such as pedestrians, cyclists, vehicles, and animals.
One such company that provides real-time object detection technology for safer driving is NAUTO.
Their system uses advanced computer vision algorithms to detect and classify objects on the road, providing the driver with real-time alerts to help them avoid collisions. The alerts are customized based on the specific object detected and the level of risk associated with it.
YOLOv5 is based on the anchor-free approach and predicts bounding boxes and class probabilities directly from the image pixels without using predefined anchor boxes.
This hands-on tutorial taught us how to implement real-time object detection using YOLOv5 and OpenCV in Python. We loaded a pre-trained YOLOv5 model from PyTorch, captured image frames using OpenCV, and detected objects in the image frames by predicting the corresponding class label with annotations.
We then displayed the output for each frame by drawing a rectangle over the predicted coordinates and classifying them with each predicted label.

Simplify Your Data Annotation Workflow With Proven Strategies
.png)


