

A Complete Guide To Setup CVAT To Perform Data Annotation


Introduction
Computer Vision Annotation Tool (CVAT) is a powerful open-source platform designed for annotating images and videos to create labeled datasets for machine learning and computer vision projects.
It supports image and video annotation, including bounding boxes, polygons, points, and key points. It excels in 3D cuboid annotation, text annotation, and temporal tracking. Collaboration is seamless, allowing multiple users to annotate simultaneously and manage roles effectively. From classification to segmentation and interpolation annotations, CVAT ensures flexibility.
This guide will walk you through the step-by-step process of setting up CVAT for efficient and accurate data annotation.
For personal or small-scale projects, installing CVAT locally on your system offers simplicity and quick setup. This option is suitable when working with limited resources or as a single user. However, for larger projects involving collaboration and scalability, deploying CVAT on a website with cloud hosting is recommended, ensuring accessibility, security, and efficient teamwork.
Let's start first by understanding the prerequisites then we'll jump into the installation.
Prerequisites
Docker: Install Docker to containerize CVAT and simplify deployment.
Docker Compose: Ensure Docker Compose is installed for managing multi-container Docker applications.
Git: Have Git installed to clone the CVAT repository seamlessly.
I am using Windows version 11 for other OS you can check here
Guide
Cloning the CVAT repository
CVAT's official repository on Git provides the latest stable releases, bug fixes, and community contributions. Utilizing the official repository ensures access to reliable and up-to-date codebase, fostering a secure and well-maintained environment for your annotation projects.
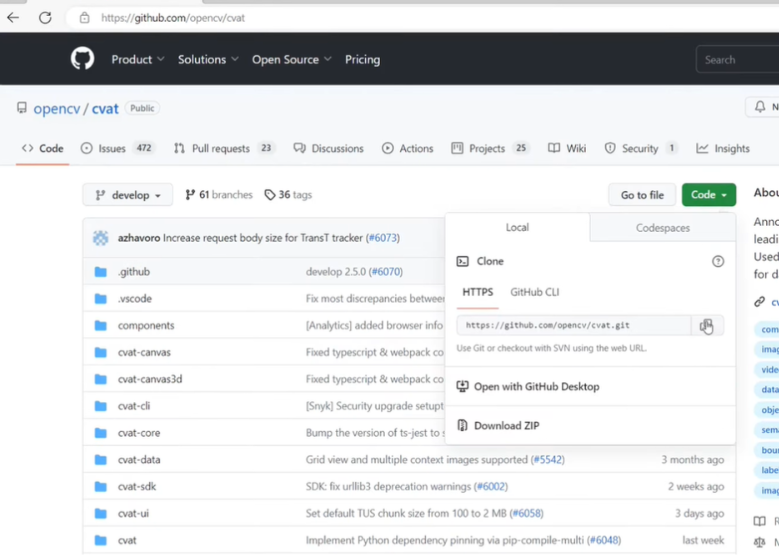
1. Go to this link : https://github.com/opencv/cvat
2. Copy this link and launch your terminal or command prompt on your local system.
3. Use the cd command to navigate to the directory where you want to clone the CVAT repository.
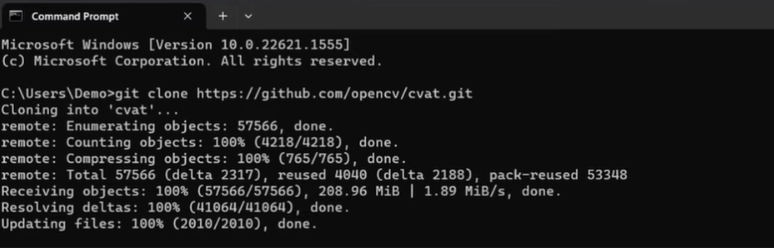
4. Execute the following command to clone the CVAT repository from GitHub :git clone https://github.com/openvinotoolkit/cvat.git
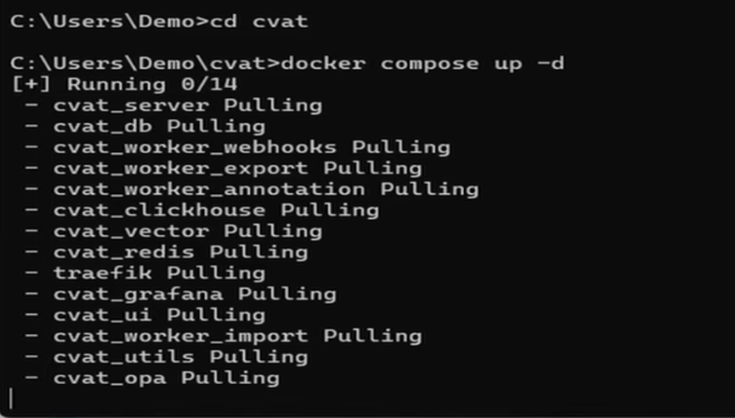
5. Run the command cd cvat follow by cvat > docker compose up –d . This runs the Docker Compose command to start CVAT in detached mode. The -d flag ensures that the containers run in the background.
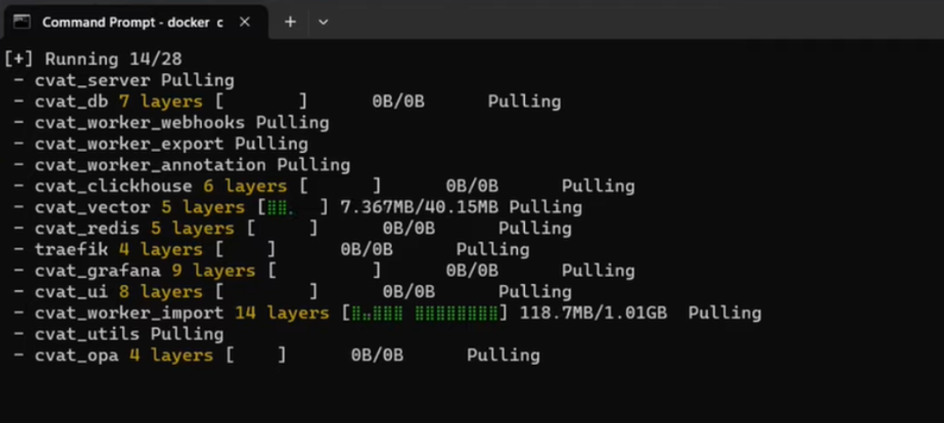
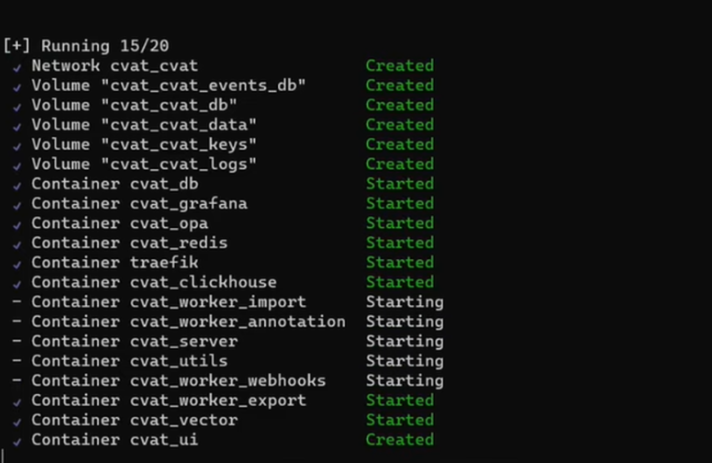
6. Once all 20 files have started run the command: docker ps. Running the docker ps command allows you to view the active Docker containers on your system. If you've successfully started CVAT using Docker Compose, you should see relevant containers related to CVAT in the output.
This command will display a list of active containers, including information such as container ID, image used, status, ports, etc. Look for containers related to CVAT in the list.

If everything is set up correctly, you should see containers like cvat_ui, cvat_server, and others, indicating that CVAT is up and running.
7. Execute the following command in your terminal: docker logs cvat_server –f. Running the docker logs cvat_server -f command allows you to view the logs of the cvat_server container in real-time. The -f flag stands for "follow," and it continuously updates the logs as new information is generated.
This will display the logs from the cvat_server container, providing insights into the status, errors, and other information related to the CVAT server. If there are any issues during startup or while running CVAT, you'll be able to see them in the log output. Press Ctrl+C to stop following the logs when you are done.
8. Then execute the command : docker exec -it cvat_server bash. The docker exec -it cvat_server bash command is used to access the command line inside the running cvat_server container interactively. This can be helpful for debugging, checking configurations, or performing various tasks within the container.
This command opens a bash shell inside the cvat_server container, allowing you to interact with the container's file system and execute commands. Once you are inside the container, you can navigate, inspect files, and troubleshoot any issues related to the CVAT server.
9. To exit the container and return to your host machine's terminal, simply type exit and press Enter.
10. Activate the CVAT virtual environment: source venv/bin/activate
Creating a Super user
Run the Django management command to create a superuser: python manage.py createsuperuser
Follow the prompts to provide a username, email address, and password for the superuser account.
After entering the required information, Django may ask for additional details. You can provide or skip them based on your preferences.
Once the superuser is created, exit the virtual environment: deactivate
Now, you've successfully created a superuser account for CVAT. You can use this account to log in to the CVAT web interface with administrative privileges.
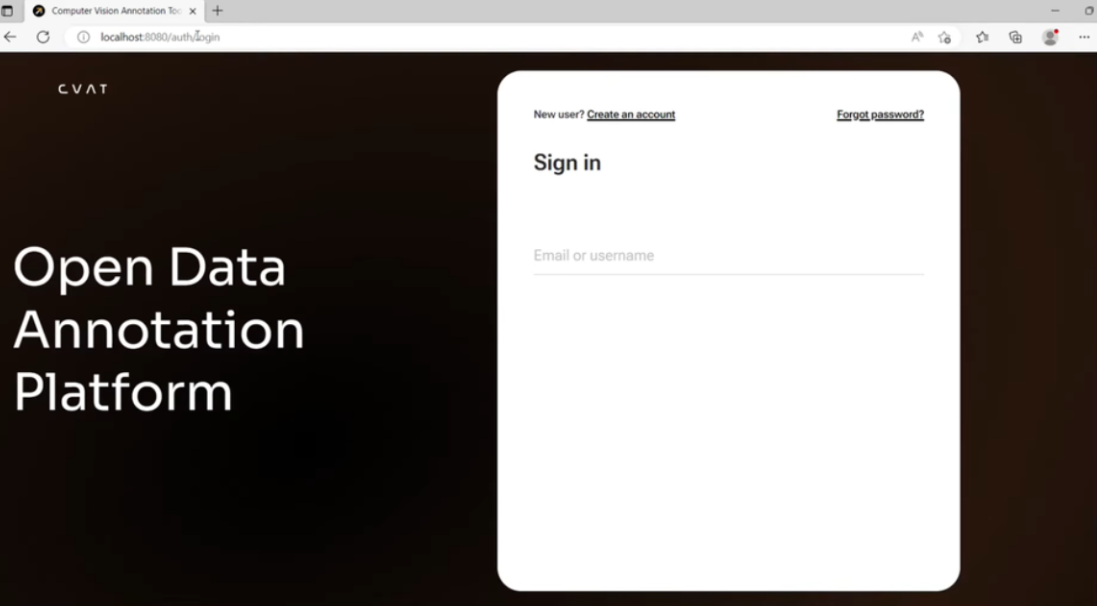
Once CVAT is set up and running, you can access it through a web browser. By default, CVAT runs on port 8080. Therefore, you can access CVAT in your web browser by navigating to this port.
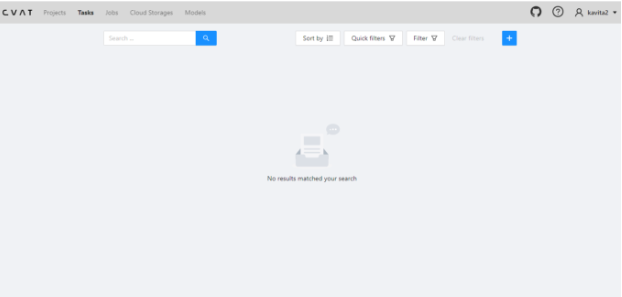
After signing with your credentials you will be welcomed by this dashboard:
Alternative Platforms
As you explore CVAT and its capabilities, it's also worth considering alternative platforms like Labellerr. With Labellerr, you can benefit from its continuously evolving models for zero-shot capabilities. These models empower users to annotate data even in scenarios where predefined categories may not cover all cases accurately.
Labellerr's data labeling engine uses automated annotation, advanced analytics and smart QA to process million images and thousands of hrs of videos in just a few weeks.
Setting up CVAT can be time-consuming, especially for users unfamiliar with Docker or manual installation methods. It may take several hours or even days to install and resolve server related issues in CVAT.
When choosing between CVAT and Labellerr, consider your project's scalability needs. While CVAT offers robust features, it might not be the best fit for scaling up. Labellerr, on the other hand, caters to both small and large projects, making it suitable for those seeking scalability.
To simplify your decision making here is a quick overview for you:
| Feature | CVAT | Labellerr |
|---|---|---|
| Dashboard To Check Daily Stats | ✔️ | ✔️ |
| Smart Feedback Loop | ❌ | ✔️ |
| Detailed Documentation | ❌ | ✔️ |
| Advanced And Extensive Filters | ❌ | ✔️ |
| Direct & Custom Project Support | ❌ | ✔️ |
| Customization Available | ❌ | ✔️ |
| Easy To Draw Multiple Layers Annotation | ❌ | ✔️ |
| Notifications For Finished Tasks | ❌ | ✔️ |
| Low Latency | ❌ | ✔️ |
Frequently Asked Questions
What is CVAT used for?
CVAT, or Computer Vision Annotation Tool, is used for annotating images and videos to create datasets for training machine learning models in computer vision tasks. It supports various annotation types like bounding boxes, polygons, and keypoints.
What is the limit of CVAT?
The limit of CVAT depends on system resources and dataset size, but it's scalable for small to large-scale annotation projects, handling thousands to millions of images efficiently.
Is CVAT free to use?
CVAT offers both open-source and commercial versions. The open-source version is free to use under the MIT License, while the commercial version offers additional features and support for a fee.
Who owns CVAT?
CVAT is an open-source project initially developed by Intel. It's now maintained and supported by the community of developers and contributors on GitHub.
Book our demo with one of our product specialist
Book a Demo